Feeds:
Posts
Comments

Posts Tagged ‘healthy eating’

My continuing research about how to improve my overall health, has led me to modify my diet so that it’s 70 to 80 percent fruits and vegetables, with a little starch and protein to round it out. I am primarily eating fish (every possible kind of seafood) and fowl (chicken and duck) for my protein, which is what I relied on for my main source of protein for the 24 years I didn’t “eat mammal.” I try to get my starch from healthy sources like sweet potatoes, but I’m half Japanese, so I regularly eat rice. I’m also not one to give up all comfort foods, so I occasionally make gluten-free pasta using brown rice or chickpea flour pastas, which the kids love. I often toss the pasta with chicken sausage, braised chard and fresh tomatoes to “health it up.” And since dairy and I remain estranged, the only dairy I consume is a little grass-fed butter, ghee and organic whole-milk, Greek-style yogurt on occasion.

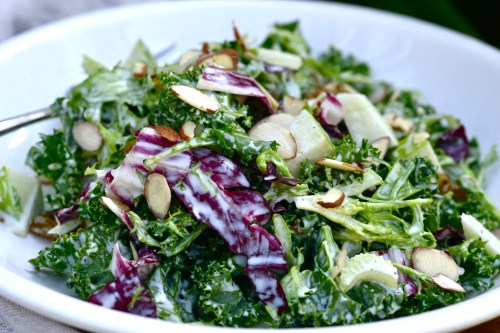
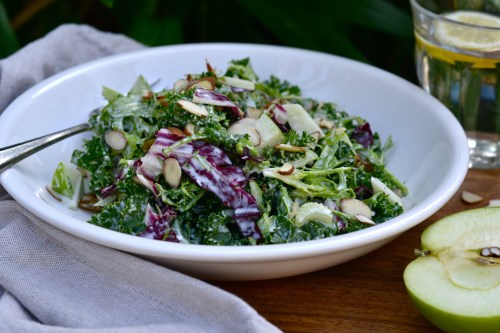
Since my diet is mainly focused on vegetables, I’m reframing my idea of what constitutes a meal. I grew up with the idea that dinner included a main dish–usually involving meat, accompanied by a simple salad and cooked vegetable. My new favorite thing to do is cook 3-4 vegetable side dishes, which together with a little protein make a fun, nutritious and not-at-all-boring meal in which there is not necessarily an obvious “main dish.” And I truly dislike eating salad for the sake of eating salad, so I’m continually searching for salads that feel like a meal in and of themselves.

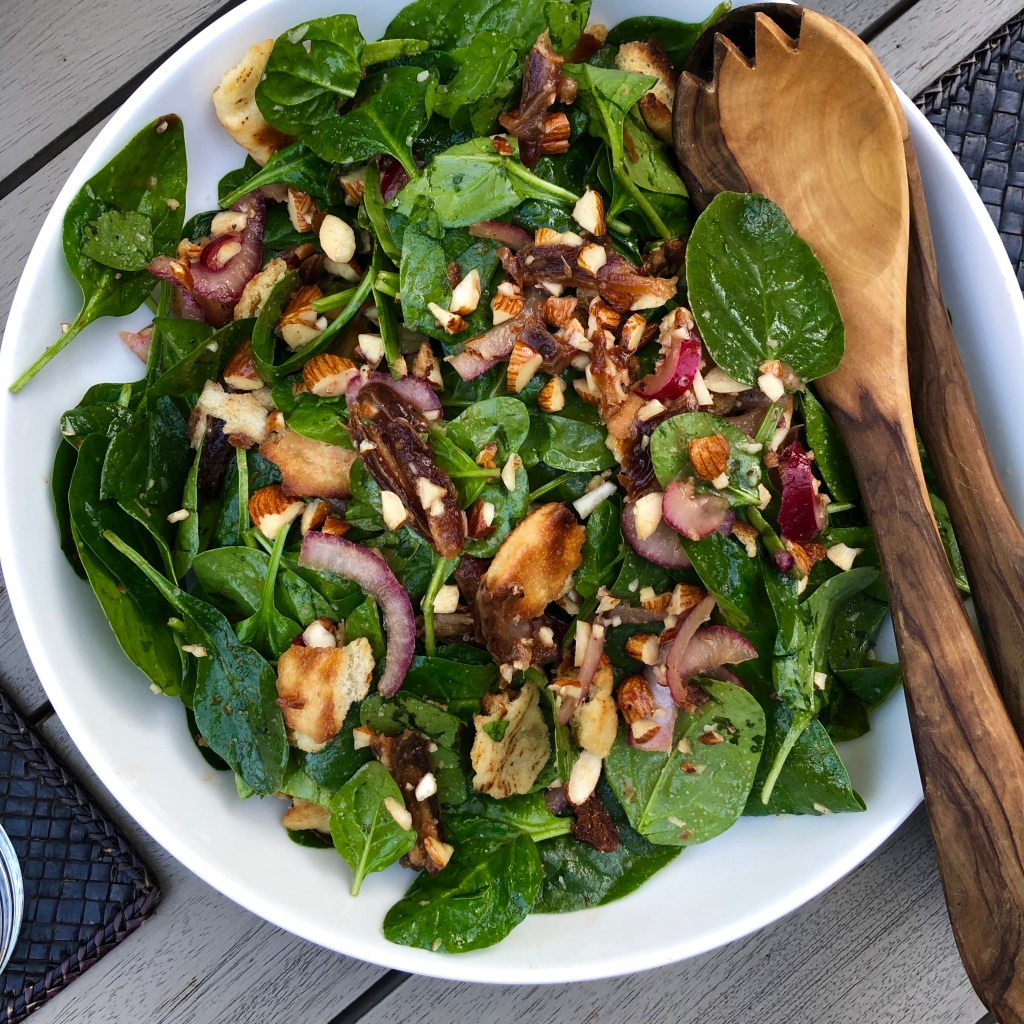
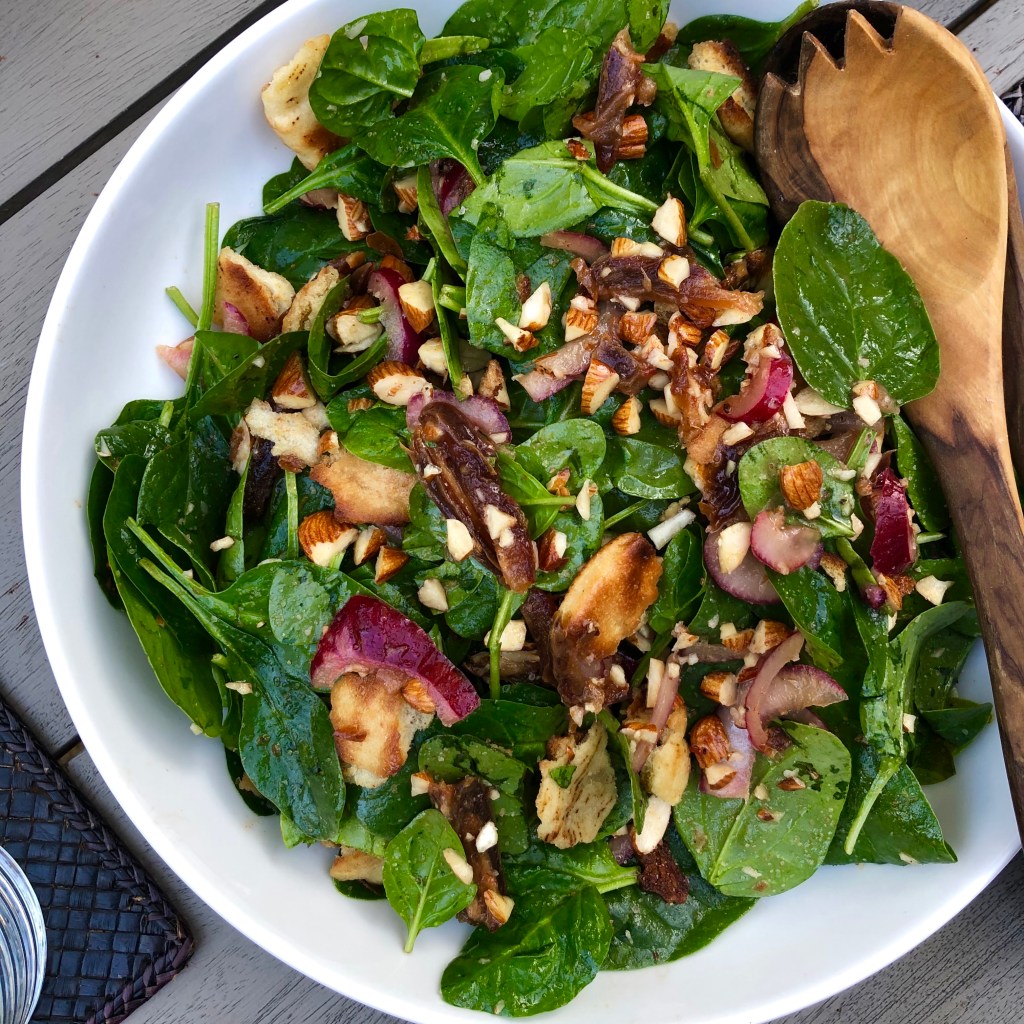
I made, served and ate this particular salad this past summer, but it’s really a dish for all seasons, and all its ingredients are readily available year-round. It’s from the Jerusalem cookbook by Ottolenghi and Tamimi. I’m a huge fan of all Ottolenghi’s cookbooks, having first discovered his incredibly delicious food in a tiny shop off Kensington High Street when I lived in London many moons ago. I was new to London–and newly pregnant, and stumbled upon the tiny shop purely by accident. Even though I lived in London only a few years, I considered a takeout meal from the shop a special treat. I fondly remember marveling at all the delectable looking dishes displayed in tiers in the shop front window. My mouth would instantly start watering upon seeing the array of colorful vegetable dishes and beautiful, yet simple desserts. Everything was fresh, flavorful and colorful. What I appreciate most about Ottolenghi’s cooking is that (most of) the dishes are relatively simple to make relying heavily on an abundance of spices and variety of textures. It’s what makes his food beautiful to look at and delicious to eat.

Most of the recipes I share on my site are completely my own invention, or they are ones I’ve modified from someone else’s recipe, or developed by combining various parts of several people’s recipes. However, this one I want to share as is because it’s perfect just as it is. One caveat is that I’ve been making it so often that I’ve stopped measuring the ingredients, and it’s fair to say you have a lot of leniency with this recipe; a little extra this or a little less that still results in a delicious salad.

Ingredients

1 tbsp white wine vinegar

1/2 medium red onion, thinly sliced

3-1/2 oz/100 g pitted, Medjool dates, quartered lengthwise

2 tbsp unsalted butter

2 tbsp olive oil

2 small pitas, roughly torn into bite-sized pieces

1/2 cup/75 g whole unsalted almonds, coarsely chopped

2 tsp sumac

1/2 tsp chile flakes

5 oz/150 g baby spinach leaves

2 tbsp fresh-squeezed lemon juice

salt

Preparation

Place the dates and onion slices in a small bowl. Add the vinegar and pink of salt and mix well with your hands. Leave to marinate for 20 minutes.

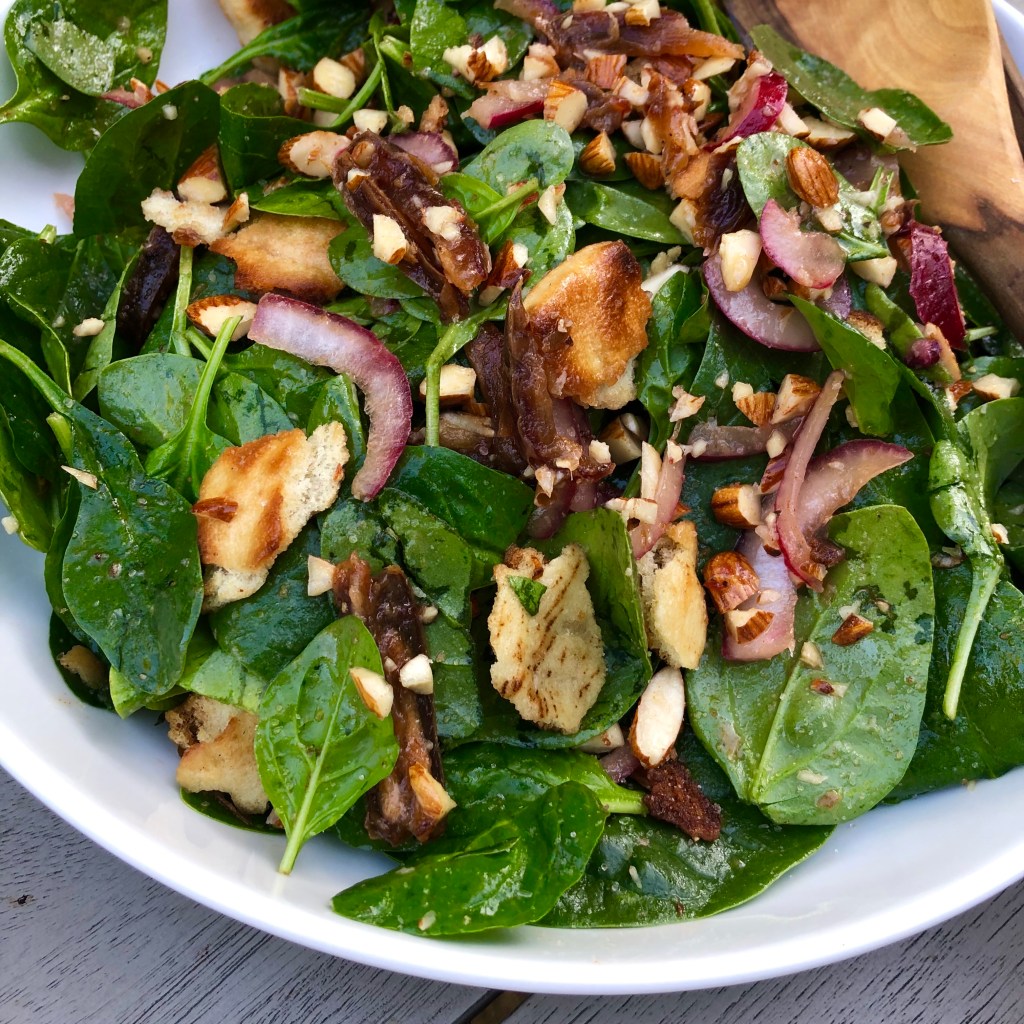
While the date mixture is marinating, heat the butter and half the olive oil in a medium frying pan. (I use my 10-inch cast-iron pan.) Add the pita and almonds and cook for 10-12 minutes, stirring all the time, until the pita is crunchy and golden brown. Note: The Ottolenghi recipe actually says to cook the pita for 4 to 6 minutes, but that has never been enough for me, so maybe our US pita cooks differently. Remove from the heat and mix in the sump, chili flakes, and 1/4 teaspoon salt. Set aside too cool.

To serve, toss the spinach leaves with the pita mix in a large bowl. Drain off and discard any extra vinegar from the date/onion mixture before adding the dates and onion to the spinach. Add the remaining olive oil, lemon juice and another pinch of salt. Adjust seasoning as desired and serve immediately.

Enjoy!

Advertisement

Read Full Post »

Here in northern California, we’ve been experiencing the full wrath of Mother Nature, who is clearly fed up with the overall lack of respect and abuse humankind has given her. In addition to devastating fires and intense heat, we’ve had seriously bad air quality since mid-August. Well, we did have a few days reprieve last week, where we all went outside, rubbing our eyes unaccustomed to bright sunlight, looking like people emerging from underground bunkers after a blitzkrieg.

Unfortunately, the reprieve was short-lived, another fire sprang up, and we find ourselves advised to stay indoors once more. It’s also very warm, again, so I’ve been hesitant to use the oven. It’s not like I can just open the windows to cool down the house at night—due to the bad air quality, and since hot temperatures are historically unusual for my area, almost no one has AC in their homes.

I try to cook dinner in a skillet whenever possible, and we’ve been consuming a lot more salads. Good news is, I have several new favorite salad recipes to share! However, those salad recipes will need to wait because right now, I want to share a delicious recipe for peanut butter and chocolate rice crispy treats! My kids–like so many others, love traditional rice crispy treats, but I can’t stomach all the sugar found in regular recipes nor do I like the fact that there is nothing remotely beneficial in them.

I’ve been tinkering around with making a peanut butter chocolate version, but was struggling to get the flavor profile right along with the right “glue” to hold the rice cereal together. One version used honey, which overpowers in flavor. One version had the chocolate blended in with the peanut butter, which helped to hold the rice cereal together, but I prefer it when the chocolate gets to hold its own, so if you’re a peanut butter and chocolate lover like me, you get two distinct flavors. I also wanted a recipe where you make your own chocolate layer from scratch instead of just melting down a bunch of chocolate chips. For one, you can better regulate how much sugar is in the chocolate.

These bars are super easy to make, super yummy, and they don’t require you to turn on your oven!

Ingredients

3/4 cup creamy organic peanut butter

1/4 cup coconut nectar

1/4 cup plus 3 Tbsp pure maple syrup, divided

2 tsp pure vanilla extract, divided

1/4 tsp sea salt, divided

4 cups organic brown rice crisp cereal

1/2 cup raw cocoa

1/3 cup full-fat coconut milk

1/4 cup coconut oil

Preparation

Line a 9-inch x 11-inch baking pan with parchment paper, folding the paper in the corners and making sure the paper comes up the sides.

In a large bowl, whisk together the peanut butter, coconut nectar, maple syrup, 1 tsp of the vanilla, and 1/8 tsp sea salt. Fold in the cereal and stir until thoroughly combined. Scoop the mixture into the pan and press it down firmly and evenly. If you don’t press enough, the the bottom of the bars may crumble when you’re eating them. Place the pan in the fridge.

In a small saucepan, over low heat, whisk the raw cocoa powder, coconut milk, and coconut oil until everything is smooth and glassy. Add a little more coconut milk if the mixture looks too thick to spread over the cereal mixture. Remove from heat and whisk in the vanilla extract and 1/8 tsp salt.

Spoon the chocolate over the cereal mixture and spread evenly with a rubber/silicone spatula. Return to the fridge until the chocolate is hardened. Cut into squares–I usually cut mine into 9-12 squares. You can store these cookies for 4-5 days in an airtight container in the fridge.

Enjoy!

Read Full Post »


This cake has become my family’s favorite easy-bake, easy-to-make, cake. It’s essentially banana bread masquerading as banana cake, but the cake shape makes it seem more special. It’s crazy moist, contains very little added sugar (because how much sugar do you need with all those bananas in there?!), and it’s a great way to use ripe and/or spotty bananas. We buy tons of bananas in Brazil because they are super inexpensive. However, I don’t even like raw bananas, so I literally buy 20 bananas a week to use in my Green Paleo Pancakes, Green Power Shake, oatmeal pancakes, breads, cakes and muffins.

I have ordered Bolo de Banana several times in Brazil, and while I’ve always found the cakes here overly sweet (not to mention full of gluten), I like how they incorporate so much banana into their recipes. So I tinkered with my gluten- and dairy-free banana muffin recipe to come up with this recipe. It uses 4-6 bananas, and instead of blending the bananas with the wet ingredients, I only mash the bananas a little with a fork so there are lots of chunks of banana in the final cake. Topping the cake with slices of banana makes the cake look more festive, and the banana caramelizes in the baking making it taste better.


Ingredients

1/2 Tbsp butter or oil

1 scant cup gluten-free all-purpose flour (I like this brand)

1/2 cup plus 1 Tbsp almond flour

1/3 – 1/2 cup sugar*

1 tsp ground cinnamon

3/4 tsp baking powder

1/2 tsp baking soda

1/2 tsp sea salt

1/4 tsp nutmeg

2-4 ripe bananas

1-2 yellow bananas

2 eggs

1/4 cup coconut oil

1/2 cup plant-based milk (I like almond or coconut)

1 tsp pure vanilla extract

*I’ve used as little as 1/4 cup of sugar, and the cake is still delicious!


Preparation

Preheat oven to 350 F (180 C). Grease and flour a standard cake tin. Place the tin on a piece of parchment paper, draw a circle using the base of the tin as a guide, cut out the circle and set it inside on the bottom of the tin. Set aside.

In a small mixing bowl, whisk together the dry ingredients until there are no lumps and everything looks thoroughly combined. Set aside.

Peel the 2-4 ripe bananas and mash with a fork until broken down but still very lumpy in consistency. You need 1-1/2 cups for this recipe, but the recipe is very forgiving if you have slightly less or slightly more. Whisk in the eggs and vanilla. Whisk in the oil and milk. Pour the dry ingredients into the wet ingredients and using a rubber spatula, fold until combined, but do not over stir. (I’ve read and been told that you can’t over stir anything made with gluten-free flour. However, in my personal experience, particular when baking cakes, one should never over stir.) Pour the batter into the prepared tin and give the tin a little jiggle to evenly distribute the batter.

Carefully slice the remaining 1-2 less ripe bananas into strips approximately 3/8-inch in thickness. Depending on the size of your banana(s), you may only need one banana. I aim for three to four strips. Lay the strips on top of the batter, and pop the tin in the center of the oven. Bake for 45-50 minutes or until a toothpick inserted comes out clean.


Enjoy!


Read Full Post »

kale butt abovekale butt close


I’m forever looking for different ways to eat more kale. After all, I do rank it as one of the best things you can eat, along with avocados, apples and eggs. Consider all the good kale can do for you… It helps lower cholesterol, it lowers your risk of at least five types of cancers, including prostrate, colon, breast, ovarian and bladder. It detoxifies the body and it provides at least 45 different flavonoids for antioxidant and anti-inflammatory benefits. What’s more, I love that unlike most lettuces, with kale you can freeze it, blanch it, massage it, as well as treat it like any other leafy green by chopping or blending it.

I ate a version of this salad at a local restaurant and have tried several times to replicate it. This comes pretty close, although the restaurant must use some sort of emulsifier in their dressing because I can’t get mine to have the same almost frothy consistency.

You will like the mixture of greens–curly kale, frisee and radicchio, combined with the crunch of the slivered almonds and apple and tender sweetness of the raisins. This makes a great lunch salad or side to any grilled fish or meat.


kale butt side


Ingredients

Salad:

1 bunch curly kale, washed, dried, ribs removed and roughly chopped

1 small head radicchio, tough core removed, washed and roughly torn

1 small head frisee, stem removed, washed and roughly torn

1 Granny Smith apple, seeded and cored and chopped into cubes

1/2 cup golden raisins

1/3 cup slivered almonds (skin on)


Dressing:

1 small garlic clove, smashed

1/2 tsp Kosher salt

3 tablespoons sour cream (or plain Greek yogurt)

3 tablespoons mayonnaise

1 tablespoon white wine vinegar

1/4 cup buttermilk

1/2 tsp fresh-ground pepper


Preparation

I put most of the instructions next to the ingredients, so at this point, it’s all pretty straight forward. Mix all the salad ingredients in a large bowl. Whisk together the dressing ingredients in a small bowl. Drizzle over the salad. Toss to coat evenly. Adjust seasoning. Serve immediately.


Enjoy!


kale leaf

Read Full Post »

I recently attended a talk and cooking demonstration given by Diana Stobo, local author of “Get Naked Fast.” The little morsels that got passed around at the event were delicious and seemingly simple to make. I bought her book on the spot, and started cooking from it the very next day.

Because I believe in balance, and because I have heard too many theories suggesting an entirely raw food diet can be unhealthy, I have never considered going completely raw. That said, incorporating a raw food approach into your existing diet can only be good for you as far as I’m concerned. Not only is your body free from foods that are difficult to digest and potentially aggravating (e.g., animal protein, processed wheat, etc.), but you are virtually always guaranteed your body will receive all the recommended servings of fruits and vegetables and then some as well as an incredible range of nutrients.

In case you’ve never read up on it, a purely raw food diet typically consists of fruits and vegetables, sprouts, seeds, seaweed, nuts, beans and some grains. Food is eaten raw (i.e., uncooked, hence no animal or animal by-products, such as diary). It is believed that heating food above 116 degrees destroys a food’s “lifeforce” and the beneficial enzymes which aid the digestion and absorption of nutrients.

Diana doesn’t advocate going completely raw, which is what I like so much about her book. For example, she cooks her quinoa (which might later be cooked in a pancake), and her lentils. She appears to be much more about lightening the load on your digestion and your body as a whole.

The six or so recipes I have tried from Diana’s book are really tasty. Even my meat-eating, meat-loving husband agrees! And what I especially like about a more raw food diet is that in addition to feeling lighter, it actually curbs my cravings for naughty things, such as cheese, cookies and pies. It actually makes me–dare I say it–dread putting something in my mouth that I know will take hours and hours to digest.

I’m striving for a 30-50 percent raw food diet. Since I haven’t eaten mammals for the past two decades, scaling back on fish and fowl is easy. My biggest hurdle is baking less.

In case you’re looking to drop a few pounds before summer is fully upon us, you might consider modifying your diet slightly toward raw food. Because of its balanced approach, I highly recommend Diana’s book as a great introduction to raw. To order, go to http://www.dianastobo.com/.

(Note: My favorite recipes from Diana’s book are Portobello Mushroom Fajitas and Spicy Lentil Tostadas.)

Happy and healthy eating!

Read Full Post »

Cook the Beans

inspired by ingredients, smells and Travels, vegan & vegetarian

Cooking Without Limits

Food Photography & Recipes

Selma's Table

Life doesn't have to be perfect to be wonderful - stories and recipes from a wonderful life...

%d bloggers like this: