Feeds:
Posts
Comments

Posts Tagged ‘cake’

Yes, it’s been ages since I posted any recipes here, but you know, sometimes life gets a little sticky and finding time to post gets tricky. That said, I haven’t stopped cooking (as you know if you follow me on Instagram!), and I now have dozens of recipes I hope to share with you here!

This Apricot Almond Cake fits where I am in my life so perfectly that it provides the perfect re-entry into blogging for me. It is crazy simple to make–both in terms of time and effort, and it’s really delicious, especially if you’re an apricot lover like me. When I say “simple,” I mean you can prepare it in less than 15 minutes (excluding cooking time, of course). It is moist, flavorful and perfect for any occasion.

Like most of my recipes, this cake is also low-sugar, dairy-free and gluten-free. I first made it with canned peaches, because fresh apricots weren’t available at the time, but this cake wants to be made with apricots–trust me!

Ingredients

1 cup gluten-free all-purpose flour*

1/2 cup almond flour

1/3 cup evaporated cane juice

1 1/2 tsp baking powder

1/2 tsp sea salt

2 pasture, free-range eggs

1/2 cup extra virgin olive oil

1/2 cup unsweetened almond milk

1 tsp pure vanilla extract

1/2 tsp almond extract

4-5 small, ripe apricots, cut in half and pitted

1 Tbsp apricot jam

Preparation

Preheat oven to 350F. Grease a 9-inch cake pan with olive oil and line the bottom with a disk of parchment paper. Set aside.

Whisk the dry ingredients together in a small bowl until well-blended.

In a medium bowl, whisk the eggs until pale yellow in color. Whisk in the oil, milk and extracts. Stir the dry ingredients into the wet until thoroughly blended. Pour into the prepared cake pan. Arrange the apricot halves, cut side up, in the pan. Place in the center of the oven and cook for 30 minutes.

While the cake is cooking, mix about 1 teaspoon hot water with the apricot jam in a small bowl. After the cake has baked in the oven for 30 minutes, remove it and spread the jam carefully over the top. Return cake to the oven and bake another 15-20 minutes or until a toothpick inserted comes out clean.

Allow cake to cool completely before serving, about 30 minutes.

Enjoy!

Read Full Post »


Do you ever get a sudden inexplicable craving for a particular dish or flavor? When I get stressed, I start craving pickles (the really crunchy dill kind) and salami–basically anything really strong in flavor. Often sauerkraut or kimchi will do in a bind. I also regularly crave almond flavor, and I’m not talking about the flavor you get from a handful of almonds. I’m talking about that super strong flavor you get from almond extract.

My mom used to make these delectable almond butter cookies using white flour, loads of butter and sugar and almond extract. They were flaky, sweet and super almondy, and while I haven’t attempted to recreate them gluten-free, I’m often nostalgic for that flavor.

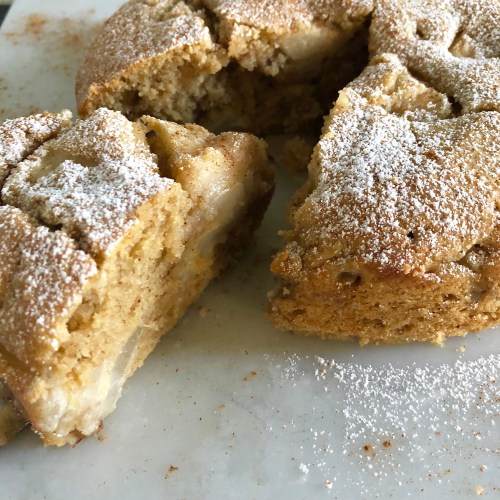
I recently discovered some pears in my fruit bowl that had become very ripe, and since they were too ripe to slice into a salad, I thought why not bake them into an almond cake? Who doesn’t love the combination of pears and almonds? The added spices make this version more flavorful and a little more “sophisticated” in case you’re serving it to guests (or leaving it on a friend’s doorstep during the COVID-19 restrictions).

Like most of my recipes, this one is super easy to make. After all, who needs more challenge and stress in their lives right now? You can make this using any variety of pear, but I prefer to use Bartlett or Packam.


Ingredients

1 cup all-purpose gluten-free flour (I like this brand)

1 cup almond flour

1 1/2 tsp baking powder

1 tsp cinnamon

1/4 tsp ground ginger

1/4 tsp ground cloves

1/4 tsp salt

1/2 cup butter, softened or 1/2 cup mild-tasting olive oil

1/2 cup sugar

2 large eggs

1 tsp pure vanilla extract

1 tsp almond extract

3 Tbsp nut milk

2 ripe pears, peeled, quartered and cored, and cut crosswise in 1/4-inch slices


Preparation

Preheat oven to 350F. Lightly grease and flour a standard 8-inch cake pan or springform pan. Cut a piece of parchment paper to fit the bottom.

In a medium size bowl, whisk together the dry ingredients.

In a larger bowl, beat the butter (if using) with a wooden spoon or rubber spatula until its a smooth, even consistency. Beat in the sugar. Beat in the eggs, one at a time, blending well. Add in the extracts and nut milk, and blend. Add the dry ingredients to the wet, and fold in just until blended. Fold in the pear slices. Spoon the batter into the prepared pan and gently smooth the top using the back of a spoon or rubber spatula.

Place in the center of the oven and bake for 55-60 minutes or until a toothpick inserted in the middle comes out clean and the cake has turned golden brown.

Allow the cake to cool completely and serve with a dusting of powdered sugar and a sprinkle of cinnamon.

Enjoy!


Read Full Post »


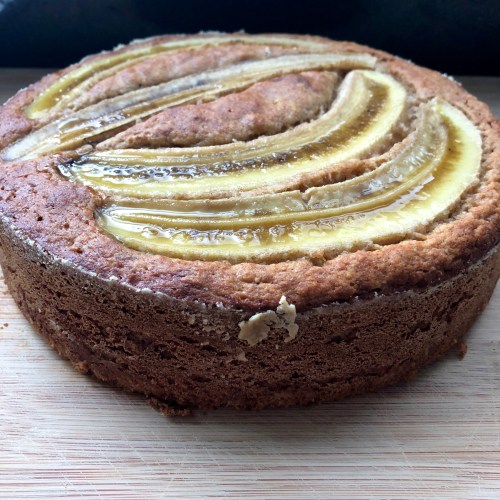
This cake has become my family’s favorite easy-bake, easy-to-make, cake. It’s essentially banana bread masquerading as banana cake, but the cake shape makes it seem more special. It’s crazy moist, contains very little added sugar (because how much sugar do you need with all those bananas in there?!), and it’s a great way to use ripe and/or spotty bananas. We buy tons of bananas in Brazil because they are super inexpensive. However, I don’t even like raw bananas, so I literally buy 20 bananas a week to use in my Green Paleo Pancakes, Green Power Shake, oatmeal pancakes, breads, cakes and muffins.

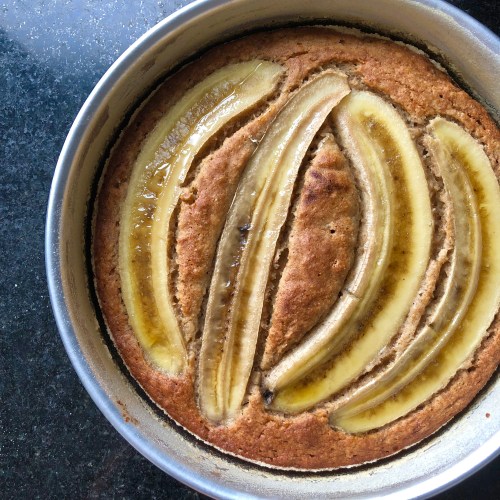
I have ordered Bolo de Banana several times in Brazil, and while I’ve always found the cakes here overly sweet (not to mention full of gluten), I like how they incorporate so much banana into their recipes. So I tinkered with my gluten- and dairy-free banana muffin recipe to come up with this recipe. It uses 4-6 bananas, and instead of blending the bananas with the wet ingredients, I only mash the bananas a little with a fork so there are lots of chunks of banana in the final cake. Topping the cake with slices of banana makes the cake look more festive, and the banana caramelizes in the baking making it taste better.


Ingredients

1/2 Tbsp butter or oil

1 scant cup gluten-free all-purpose flour (I like this brand)

1/2 cup plus 1 Tbsp almond flour

1/3 – 1/2 cup sugar*

1 tsp ground cinnamon

3/4 tsp baking powder

1/2 tsp baking soda

1/2 tsp sea salt

1/4 tsp nutmeg

2-4 ripe bananas

1-2 yellow bananas

2 eggs

1/4 cup coconut oil

1/2 cup plant-based milk (I like almond or coconut)

1 tsp pure vanilla extract

*I’ve used as little as 1/4 cup of sugar, and the cake is still delicious!


Preparation

Preheat oven to 350 F (180 C). Grease and flour a standard cake tin. Place the tin on a piece of parchment paper, draw a circle using the base of the tin as a guide, cut out the circle and set it inside on the bottom of the tin. Set aside.

In a small mixing bowl, whisk together the dry ingredients until there are no lumps and everything looks thoroughly combined. Set aside.

Peel the 2-4 ripe bananas and mash with a fork until broken down but still very lumpy in consistency. You need 1-1/2 cups for this recipe, but the recipe is very forgiving if you have slightly less or slightly more. Whisk in the eggs and vanilla. Whisk in the oil and milk. Pour the dry ingredients into the wet ingredients and using a rubber spatula, fold until combined, but do not over stir. (I’ve read and been told that you can’t over stir anything made with gluten-free flour. However, in my personal experience, particular when baking cakes, one should never over stir.) Pour the batter into the prepared tin and give the tin a little jiggle to evenly distribute the batter.

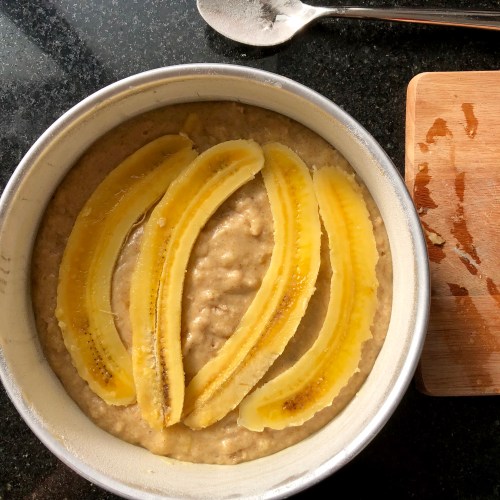
Carefully slice the remaining 1-2 less ripe bananas into strips approximately 3/8-inch in thickness. Depending on the size of your banana(s), you may only need one banana. I aim for three to four strips. Lay the strips on top of the batter, and pop the tin in the center of the oven. Bake for 45-50 minutes or until a toothpick inserted comes out clean.


Enjoy!


Read Full Post »

chscake1chscake3chscake4chscake7


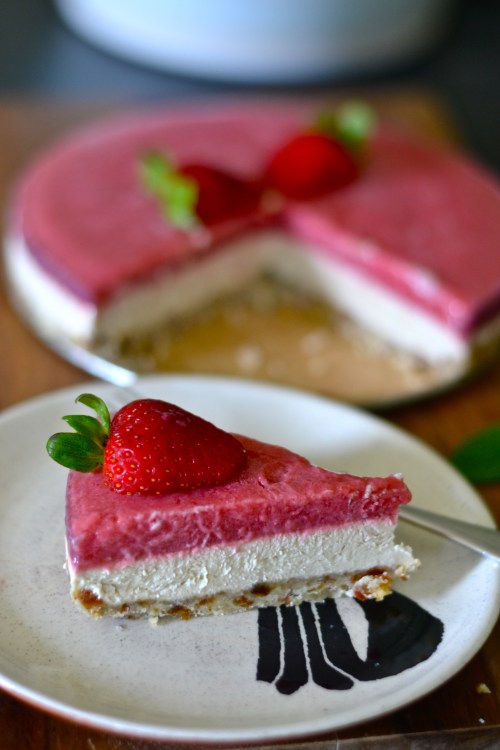
If you’ve never eaten raw cheesecake before, you will be shocked at how much like traditional (think Kraft Philadelphia cream cheese) cheesecake it tastes! In fact, I prefer raw vegan desserts over traditional desserts nearly all the time now. A few exceptions include my lemon olive oil cake and chocolate rosemary cake. As an added bonus, most traditional desserts, even when they’re made with reduced sugar, contain either dairy or gluten–both of which many of us would like to avoid these days. Even if a dairy-laden dessert (e.g., panna cotta, cheesecake, etc.) doesn’t result in uncomfortable and unpleasant side effects, such as gas, cramping and bloating, I always feel “ugh” after eating it.

But after indulging in even a large piece of raw vegan cheesecake, I might feel full, but I also feel light and comfortable and I love knowing I just consumed something that tasted delicious and was actually good for me. Soaked cashews give raw cheesecakes an insanely creamy silky texture that I find superior to anything you get using traditional cream cheese.

Just a few months ago, I served a raw vegan lemon cheesecake to my father who is approaching 80 and is very–did I mention very–traditional about food, particularly dessert. He gave the cheesecake a thumbs up and was shocked to learn it was dairy-free.

Although this recipe is for strawberry cheesecake, you can easily substitute raspberries, blueberries or mango for the top layer. Maybe some really clever cook more talented than me will make three layers of fruit, which would look awfully pretty once sliced.


Ingredients

Crust:

3/4 cup walnuts

1/2 cup almond meal

2 tbsp coconut oil, melted

1/2 cup medjool dates, pitted

Pinch of kosher salt

Filling:

1 cup cashews, soaked in salted water overnight

1/2 cup plant milk (I use almond)

1/8cup coconut oil, melted

2 tbsp pure maple syrup

1 tsp pure vanilla extract

Pinch kosher salt

Topping:

2 cups fresh strawberries, hulled

1-2 tbsp pure maple syrup

1 tbsp coconut oil, melted

Squeeze of fresh lemon juice


Preparation

Line the bottom of an 8-inch springform pan with parchment paper.

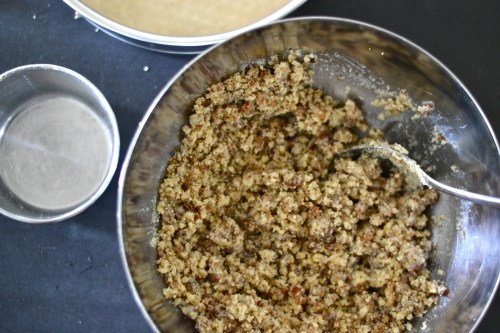
Process the ingredients for the crust in a food processor using the pulse function until you get a similar texture to this (see photo). Dump the crumbly mixture into the pan and use your hands to press it firmly and evenly into the bottom. Place in the fridge to set while you prepare the filling.


chscake5chscake6


Drain the soaked cashews and rinse with filtered water. Place all the ingredients for the filling in a high-powered blender (such as a Vitamix), and blend, starting on low and moving to high until you have a completely even, creamy consistency. Pour the filling mixture over the crust and place in the freezer for 1 hour.

Put the ingredients for the topping into a blender and process until it’s a thick, even consistency. Pour over the filling and return to the freezer for 4-5 hours.

Transfer the cheesecake from the freezer to the fridge at least 1 hour before serving.

Enjoy!


chscake2

Read Full Post »

Cook the Beans

inspired by ingredients, smells and Travels, vegan & vegetarian

Cooking Without Limits

Food Photography & Recipes

Selma's Table

Life doesn't have to be perfect to be wonderful - stories and recipes from a wonderful life...