Here in northern California, we’ve been experiencing the full wrath of Mother Nature, who is clearly fed up with the overall lack of respect and abuse humankind has given her. In addition to devastating fires and intense heat, we’ve had seriously bad air quality since mid-August. Well, we did have a few days reprieve last week, where we all went outside, rubbing our eyes unaccustomed to bright sunlight, looking like people emerging from underground bunkers after a blitzkrieg.
Unfortunately, the reprieve was short-lived, another fire sprang up, and we find ourselves advised to stay indoors once more. It’s also very warm, again, so I’ve been hesitant to use the oven. It’s not like I can just open the windows to cool down the house at night—due to the bad air quality, and since hot temperatures are historically unusual for my area, almost no one has AC in their homes.
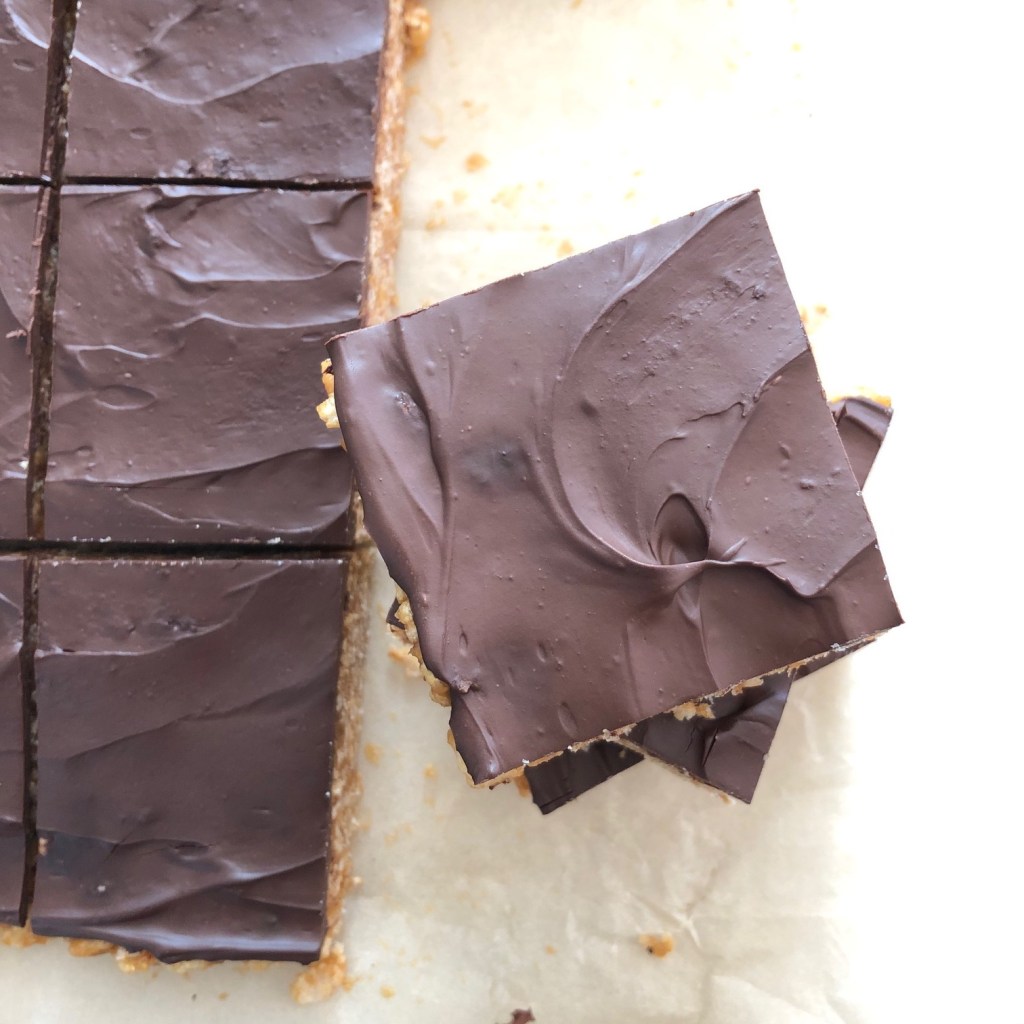
I try to cook dinner in a skillet whenever possible, and we’ve been consuming a lot more salads. Good news is, I have several new favorite salad recipes to share! However, those salad recipes will need to wait because right now, I want to share a delicious recipe for peanut butter and chocolate rice crispy treats! My kids–like so many others, love traditional rice crispy treats, but I can’t stomach all the sugar found in regular recipes nor do I like the fact that there is nothing remotely beneficial in them.
I’ve been tinkering around with making a peanut butter chocolate version, but was struggling to get the flavor profile right along with the right “glue” to hold the rice cereal together. One version used honey, which overpowers in flavor. One version had the chocolate blended in with the peanut butter, which helped to hold the rice cereal together, but I prefer it when the chocolate gets to hold its own, so if you’re a peanut butter and chocolate lover like me, you get two distinct flavors. I also wanted a recipe where you make your own chocolate layer from scratch instead of just melting down a bunch of chocolate chips. For one, you can better regulate how much sugar is in the chocolate.
These bars are super easy to make, super yummy, and they don’t require you to turn on your oven!
Ingredients
3/4 cup creamy organic peanut butter
1/4 cup coconut nectar
1/4 cup plus 3 Tbsp pure maple syrup, divided
2 tsp pure vanilla extract, divided
1/4 tsp sea salt, divided
4 cups organic brown rice crisp cereal
1/2 cup raw cocoa
1/3 cup full-fat coconut milk
1/4 cup coconut oil
Preparation
Line a 9-inch x 11-inch baking pan with parchment paper, folding the paper in the corners and making sure the paper comes up the sides.
In a large bowl, whisk together the peanut butter, coconut nectar, maple syrup, 1 tsp of the vanilla, and 1/8 tsp sea salt. Fold in the cereal and stir until thoroughly combined. Scoop the mixture into the pan and press it down firmly and evenly. If you don’t press enough, the the bottom of the bars may crumble when you’re eating them. Place the pan in the fridge.
In a small saucepan, over low heat, whisk the raw cocoa powder, coconut milk, and coconut oil until everything is smooth and glassy. Add a little more coconut milk if the mixture looks too thick to spread over the cereal mixture. Remove from heat and whisk in the vanilla extract and 1/8 tsp salt.
Spoon the chocolate over the cereal mixture and spread evenly with a rubber/silicone spatula. Return to the fridge until the chocolate is hardened. Cut into squares–I usually cut mine into 9-12 squares. You can store these cookies for 4-5 days in an airtight container in the fridge.
Enjoy!