Feeds:
Posts
Comments

Posts Tagged ‘easy meals’

oats10oats1oats3oats7


If you read a lot of health-focused food blogs and/or follow a lot of plant-based Instagram users, you’ve undoubtedly seen many photos of overnight oats. They have become a thing–that’s for certain, but I for one can easily see why. Regular cooked oats don’t always sit right with my tummy, and the texture can get a little weird–as in too gummy, tending toward slimy, etc. However, overnight oats keep my tummy humming along nicely, they’re never slimy or gummy–just cool and creamy (although I know some people like to heat theirs).

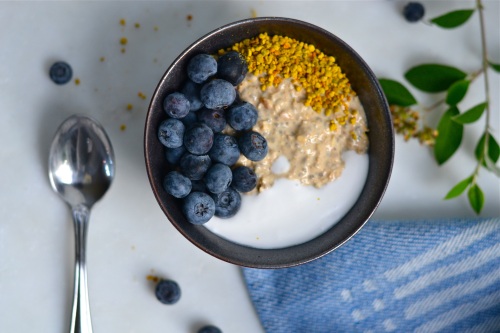
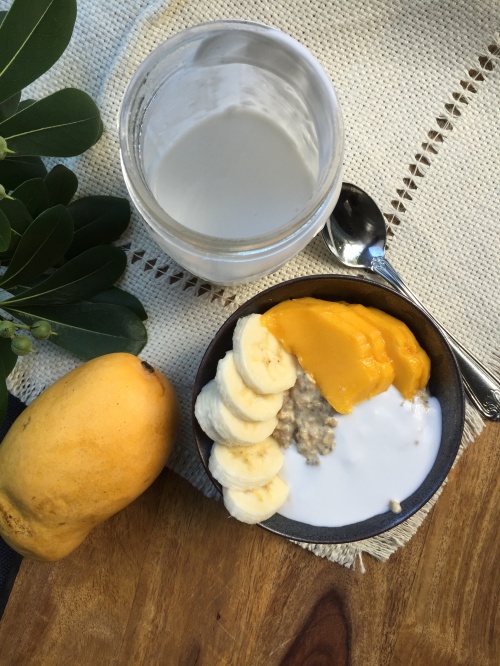
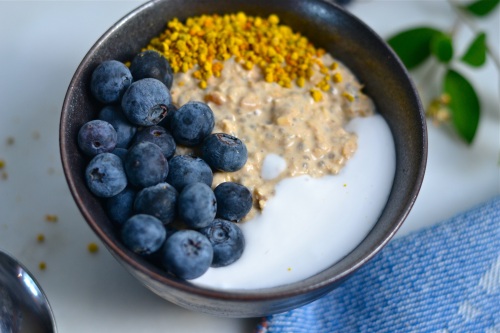
If you find yourself intrigued by the idea, and if you haven’t tried them yet, try them!! You can alter a basic bowl of overnight oats at least two dozen ways. I like to make mine with peanut butter, then add more goodies in the morning, such as fresh fruit and coconut cream. (The nut butter adds enough protein and healthy fat that I stay full all the way until lunch time.) Some like to add a little chocolate drizzle by combining cocoa powder, coconut oil and a little sweetener over heat. That’s too decadent for my mornings, so I tend to stick with fresh mango and banana or berries.

I also love that you can prepare it in 2 minutes the night before, and have a delicious breakfast ready to go in the morning! My mornings are always rushed with making the children breakfast, packing their lunches, feeding our three cats, coordinating play dates, etc. I like that I can just reach in the fridge and voila–breakfast is ready.

I hope you enjoy this dish as much as I do!


Ingredients for one

1/2 cup gluten-free rolled oats

1 tbsp black chia seeds

2/3 cup almond or other plant-based milk

2 tbsp peanut butter or other nut butter

1 tbsp maple syrup

1 tsp pure vanilla extract

Pinch kosher salt


Preparation

Stir together all the ingredients. Cover and put in the refrigerator overnight.

In the morning, stir again, add a little coconut cream or milk and some fruit, and…


Enjoy!


oats2

Advertisement

Read Full Post »


chick4chick1


I first made this dish a few months ago, at the end of a day that had gotten away from me. I knew there were six or so chicken thighs tucked in the meat drawer of the refrigerator, which I had planned to whip up into some Middle Eastern dish. However, I was out of time, and recognized I was short a few ingredients for some of my favorite Ottolenghi dishes.

I’m a big fan of skillet dishes and just about anything braised, so mustering up a last bit of inspiration, I threw this together in about 30 minutes, and we all declared it delicious. Because I love simple, easy to prepare meals, I loved this dish even more for its remarkable flavor given it’s incredible simplicity.

We ate ours with a simple side salad, but you could also serve it over mashed potato, mashed cauliflower, rice or a little pasta.


Ingredients

6 chicken thighs, bone in and skin on (about 2 lbs)

1 medium onion, peeled and thinly sliced

1 tbsp olive oil

2 cloves garlic, minced

1 tsp dried oregano

1 tsp dried basil

1 14-oz can diced tomatoes

1 14-oz can artichoke hearts

1-2 tbsp capers plus a little juice

sea salt

fresh-ground pepper

1-2 tbsp fresh parsley chopped, optional

chick2


Preparation

Heat a large skillet over medium heat. Dry the chicken thighs with a paper towel, season liberally with salt and pepper, and set skin side down in the skillet. Brown on both sides, about 6-8 minutes total. Use tongs to remove the thighs onto a plate or bowl. Set aside.

Drain the chicken fat into a small bowl (never pour down your drain!). Add in the olive oil and onion and cook, stirring frequently, under the onion softens and begins to color. Add in the spices and garlic, and cook 2-3 minutes more. Return the chicken thighs to the pan, skin side up. Add in the tomatoes, artichoke hearts, capers and caper juice and stir a little to combine (without covering the chicken). Bring to a boil, cover and simmer for 20-25 minutes until the chicken thighs are cooked through and the tomatoes and onion have started to break down.

If you eat chicken skin, as I do, and you like yours super crispy, as I do, you can place the skillet uncovered under the broiler for a few minutes just before serving. Garnish with chopped parsley if desired, and a few grinds of fresh pepper.

Happy eating!


chick3


Read Full Post »

Cook the Beans

inspired by ingredients, smells and Travels, vegan & vegetarian

Cooking Without Limits

Food Photography & Recipes

Selma's Table

Life doesn't have to be perfect to be wonderful - stories and recipes from a wonderful life...

%d bloggers like this: