Feeds:
Posts
Comments

Archive for the ‘Recipes’ Category

plums4


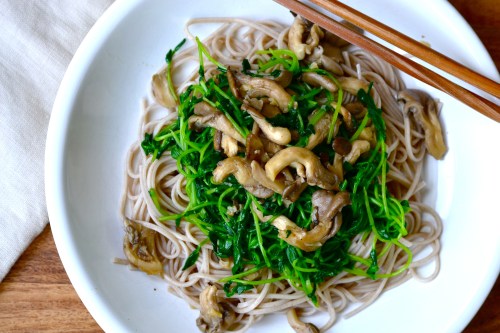
I haven’t posted in a while, but I’ve been cooking and eating plenty. Aside from a two-week holiday to six East Coast cities and towns, I have spent countless hours in biblical history. What’s that, you say? Well, in reality, it’s likely just the result of the drought we’re experiencing throughout California, but we’ve been plagued with everything from mites on the chickens to fleas on the cats to ants invading our kitchen. And I’m not alone in this plague of pestilence. Even the restaurants in our local towns have been battling the ant problem. Ask for a cup of tea, and you’re likely to get it with a pinch of tiny ants. Every possible little pest is hungry and thirsty and running amuck since temperatures continue to run higher than normal and their normal food supplies are scarce–or so I’ve been told. Now I could launch into a larger discussion about global warming, but let’s save that for another time and get back to food.

The most amazing plums keep piling up on the produce stands in my area. They’re rich in color, incredibly juicy and sweet as can be. I don’t know many recipes that use plums, but plum crisp would beat them all anyway. I find that cooking plums with a little lemon zest and sugar really concentrates their flavor. I’ve made this crisp using plums and apples, but plums alone offers the most intense flavor.


Ingredients

7-8 plums and/or pluots, pitted and quartered

zest from a lemon

1 tsp pure vanilla extract

1 tsp cornstarch (optional)

1 tbsp coconut or cane sugar

3/4 cup porridge oats

1/4 cup walnuts, finely chopped

1/2 cup almond flour/meal

1/2 coconut or cane sugar

1 pinch of sea salt

1/2 tsp ground cinnamon

1/2 cup (1 stick) unsalted butter, chilled and cut into 8 pieces


Preparation

Preheat the oven to 375F.

In a medium-size bowl, mix the plum segments, lemon zest, and vanilla. Sprinkle with 1 tbsp sugar and the cornstarch if using, and toss to coat evenly. Evenly divide and scoop the fruit mixture into four ramekins.

plums rawplumscps

In another bowl, mix the dry ingredients together with a fork. Break down any lumps in the almond flour and stir until everything is thoroughly combined. Using a pastry cutter or two knives and two good hands, cut the butter into the flour mixture until it resembles coarse crumbs. Spoon out evenly over the fruit in the four ramekins.

plums filled

Place the ramekins in the oven and cook for 20-30 minutes or until the crumb topping turns golden brown and the fruit mixture is bubbling. Remove from oven and place on a wire rack. Allow to cool for at least 20 minutes (or tongues will get burned!).

Serve warm or at room temperature with a scoop of vanilla ice cream or coconut milk ice cream.

plums5

Enjoy!

Read Full Post »


EF cookies bakedEF cookies stored


I’m still sticking to the egg-free diet in solidarity with my daughter. It’s been two months, and I admit, it’s been easier than expected. I think the thing I miss most and have to hassle with most often is aioli. I rarely eat sandwiches, but when I do, some sort of aioli, is usually part of it–think pesto, cilantro or roasted red pepper aioli. I also eat French fries infrequently, but when I do, they’re usually sweet potato fries, and I only want to dip them in wasabi aioli.

I also miss all the baked goods I made regularly. I’ve learned it’s tough to give up eggs and be gluten-free or grain-free. All those grain-free treats I made using almond flour instead of regular wheat flour require eggs, and egg replacers only work some of the time.

But my determination to offer my daughter familiar things, has led me to try numerous egg-free recipes, some of which have been disastrous while others have been huge hits. For example, the egg-free pancakes I posted last now stand as her favorite pancakes, and it appears that the previous oatmeal and egg version she loved is all but forgotten. The egg-free waffles I’ve been experimenting with still aren’t ready to share, but I’m starting to wonder if part of the problem is my actual waffle iron, which has to be close to 20 years old.

These cookies definitely make the grade. They boast great flavor, texture and just the right amount of sweetness, and the inside of the cookies stay chewy while the outer edges get crispy–just how we like our cookies to be! I make mine with butter, but you could easily substitute coconut oil for the butter and make completely vegan cookies.

(Adapted from Madhuram’s Eggless Cooking.)

EF cookies baked3EF cookies baked2


Ingredients

1  cup all-purpose flour

1 cup whole-grain spelt flour

1/4 cup flaxmeal

1 tsp baking soda

1/4 tsp salt

1/2 tsp ground cinnamon

1 cup (2 sticks) butter, softened

1/2 cup (scant) granulated sugar

1/2 cup (scant) brown sugar

2 tsp pure vanilla extract

4- 1/2 teaspoons Ener-G (egg substitute)

6 Tbsp water

1/2 cup semi-sweet chocolate chips*

1/2 cup walnuts, finely chopped (optional)

*I like to use the Enjoy Life Vegan Chocolate Chips

Preparation

Preheat oven to 375F/190C. Line two cookie sheets with parchment paper to fit.

In a large bowl, cream together the butter, sugars and vanilla using an electric mixer.

Put the egg replacer in a small bowl and whisk in the water gradually until thoroughly blended. Add this mixture to the butter mixture and blend until thoroughly combined.

In another bowl, whisk together the flour, baking soda, cinnamon and salt.


Fold the flour mixture into the wet mixture and stir until just blended. Fold in the chocolate chips and nuts, if using.


EF cookies mixEF cookies mix2
Using a tablespoon, drop the dough onto the baking sheet. (The dough can be quite sticky, so I usually use two spoons for this.)


EF cookies drop


Bake 10 -12 minutes, or until the edges are golden brown.

Let cool for at least 5 minutes, then enjoy warm or at room temperature. You can store the cookies for several days in an airtight container.

Yields approximately 24 3-inch diameter cookies.


Enjoy!


Read Full Post »


pancakes side2pancakes above


You might recall a post from last year in which I described how I took a food sensitivity test that told me I’m highly sensitive to eggs, green peppers and pineapple. I also discussed how this type of test gets mixed reviews, but it continues to be very popular among alternative practitioners.

Well my daughter has been suffering from a mildly stuffy and/or runny nose for months. When I first noticed it last summer, I assumed she was getting an out-of-season cold–just a fluke. We were traveling in Europe, and I figured the long flights and significant time change were making her susceptible. When the mild “cold” came home from Europe with us, I assumed she must have seasonal allergies, or that she had developed an allergy to dust mites (covering all those millions of tiny Lego pieces strewn across every surface in her room) or pollen or something along those lines.

I took her in for an allergy skin test which showed she has very sensitive skin but isn’t allergic to any of the usual suspects. On the doctor’s recommendation, I later took her in for an allergy blood test. Once again, it showed she isn’t allergic to any of the common allergens. I eventually took her to see an MD who’s also a Homeopath. After asking me a lot of questions about my daughter’s diet, her mucus and various other bodily functions, the doctor concluded she must have a food sensitivity and ordered the IgG test. The doctor suspected a dairy allergy, which I was secretly hoping for because I already substitute coconut and almond milk for dairy in most of my cooking.

Several weeks later we learned, that according to the test, my daughter is, like me, highly sensitive to eggs. Of course eggs would turn out to be the culprit! After all, I feed my kids eggs every day. My whole family loves eggs. I love to bake and nearly every favorite recipe calls for eggs. And we have three chickens. Not to mention, I consider the egg one of the most nutritionally perfect foods available. But alas and alack, no eggs for three months, said the doctor.

Since I never did give up eggs even after my igG test indicated I was highly sensitive to them (I just began eating them less frequently), I decided to not eat eggs for three months in solidarity with my daughter.

Here’s where you can envision the fingers drumming on the table and the foot tapping impatiently… We are three weeks into our 3-month sentence, and it’s tough going. Eggs are in everything–at least nearly everything we love. And I’ve practically stopped baking since it’s pretty difficult to bake anything decent without using eggs.

But I have discovered that there are some surprisingly good eggless versions of some of our breakfast standbys. For example, this pancake recipe is remarkably good, and just as easy to make as my oatmeal pancakes. I’m also experimenting with eggless waffles. When I get the recipe right, I’ll share it here. In the meantime, if you have an egg sensitivity or simply want more eggless options, try these delicious, surprisingly light and fluffy pancakes.

pancakes side


Ingredients (for approximately 6 4-inch diameter pancakes)

1 cup whole-grain spelt flour

2 heaping tbsp ground flaxseed

1 tsp honey

1/2 tsp cinnamon

2 tsp baking powder

1 1/4 cup milk (cow’s or almond work best)

1 tbsp water

3 tbsp coconut oil melted

1 tsp vanilla extract


Preparation

Whisk together the dry ingredients.

Pour the milk into a 2-cup measuring cup. Add the water, vanilla extract and coconut oil to the milk.

Whisk the wet into the dry until just combined. Do not overstir. Let sit for 2-3 minutes.

Heat a large cast-iron or other griddle pan over medium heat. Add in a little butter or coconut oil and spoon in your pancake batter. Cook approximately 2 minutes or until golden brown before flipping over.

Serve with love.


Enjoy!


pancakes close

Read Full Post »

soba abovesoba close


I love dishes like this that contain only a handful of ingredients and can be made using one pan.

Despite how simple this dish looks, it contains a wonderful mix of flavors and textures, and it’s plenty nutritious and filling. You can also alter this dish in a variety of ways if you want to create a more substantial meal or simply for looks. I’ve made a few suggestions below.

I made this dish last week for lunch, and planned to eat the remaining portion the next day. But it was so delicious, I devoured the second portion for dinner that same day.

soba ingredients


Ingredients

1 tbsp avocado oil (or other mild-flavored oil)

2 cloves garlic, finely minced

3/4 cup chicken or vegetable stock

6 oz mushrooms*

4 oz pea shoots

1 package soba noodles

Sea salt and fresh-ground pepper to taste

1 tsp toasted sesame oil

1 generous pinch red pepper flakes (optional)

*I like to use tree oyster mushrooms because I can buy them very local, and they have a wonderfully silky but firm texture. Shitake would also work well. Using white button or cremini will take away from the texture and Asian-inspired flavors of this dish.


Preparation

Bring a pot of water to boil, and cook the soba noodles per their instructions. (The brand I buy cook for 4 minutes.) Drain and rinse repeatedly with cold water until the noodles are no longer warm to the touch. Set aside.

While the water for the noodles is heating up, heat the avocado oil in a 12-inch cast-iron or other skillet over medium heat. Add the garlic, and cook, stirring occasionally until tender and fragrant–about 2-3 minutes. Add in the stock and cook for 5-7 minutes or until the stock reduces by half. (You may want to turn up the heat here to medium-high.)

Add in the mushrooms and cook until very tender, 4-5 minutes. Add in the pea shoots and cook until just tender and bright green. Season with salt and pepper. Toss the vegetable/mushroom mixture with the noodles making sure to include any left over juices, too. Drizzle the sesame oil, sprinkle on the red pepper flakes if using, and serve immediately.

Note: If you want to add more protein, consider adding sauteed prawns or fresh crab–both are delicate enough that they won’t overpower the delicious but light flavor of the pea shoots.


Enjoy!

Read Full Post »

carrot above2carrot closecarrot container


Who doesn’t love carrot cake?! But let’s be honest… The average carrot cake recipe is loaded with sugar. In fact, most carrot cake recipes contain more sugar than nearly any other type of cake, including my personal favorites–red velvet and tres leches!

One day, I will manage to construct a carrot cake that tastes delicious, has great texture and isn’t loaded with sugar (and maybe uses whipped coconut cream for the frosting instead of cream cheese and sugar!). When that day comes, I will be sure to take lots of photos of the creation (i.e., notable accomplishment), and share the recipe. But until that day comes, these little bites will do a nice job of reminding you of carrot cake, and hopefully satisfy any cravings. They taste remarkably like  carrot cake and what’s more, these little bites contain only good stuff that fuels your body.

My kids love these bites, and they make a perfect afternoon snack for hungry tummies.

This recipe is slightly modified from from the wonderful One Sweet Mess. I tweaked a few measurements to my liking, and omitted the pineapple since the food sensitivity test I took last year informed me I don’t tolerate pineapple well.


Ingredients

2/3 cup grated carrot

1/3 cup oats

1/3 cup  coconut flakes

2 tbsp ground flaxseed

1 tsp ground cinnamon

1/2 tsp ground ginger

Pinch sea salt

1 tsp raw honey

4 Medjool dates, pitted

1/2 cup pecans, finely chopped

1 tsp vanilla extract

3/4 cup fine coconut flakes

Note: I didn’t make the bites photographed here using raisins, but they work well, too, and can be substituted for the dates (1/2 cup).


carrot shred


Preparation

In a food processor, pulse together the carrot, oats, flaxseed and spices. Add in the remaining ingredients (except for the 3/4 cup coconut flakes) and pulse until thoroughly combined.

carrot mix

Using your fingers or a teaspoon, scoop out enough of the mixture to roll into an approximately 1-inch diameter ball. Roll the ball in the coconut flakes until coated. Finish the remaining mixture using the same process. Store the balls in an airtight container in the refrigerator.

Serve cold. (I’m adding this comment post-publishing… These need to be served cold–straight from the frig. They are not nearly as good if they’re at room temperature, or worse–warm.) Keeps for 3-4 days in the frig.


Enjoy!


carrot above

Read Full Post »

oat aboveoat close


I apologize that I haven’t posted anything in nearly two weeks… Sometimes life just gets in the way, as I’m sure you’ve experienced. I also go through periods of what I think of as “food homeostasis”–where I’m not trying many new dishes or experimenting with recipes, and I want, and hence cook, the same 5-7 dishes for a week or two. This typically occurs when I’m trying to stick to a restrictive diet (e.g., no gluten, Paleo, no sugar) or when I have loads of work to do and want the comfort and consistency of my standby meals.

But all that aside, over the past few weeks, cravings for butterscotch and caramel flavors keep sneaking into my head. Of course, there’s nothing healthy about butter and brown sugar, so I’ve been pushing the cravings down as best I can. But at some point, I determined that the cravings were a good excuse to make a healthier-than-normal version of British flapjacks.

During the years I spent living in London, flapjacks were one of my on-the-go treats. I suppose the high content of oats made me feel as though I wasn’t being too naughty, but really, it was just the terribly naughty butter and brown sugar combination that lured me.

So here is a somewhat healthier version of the traditional flapjack. It still relies on butter and brown sugar to make the butterscotch flavor, but this recipe doesn’t use a ton of sugar, and it contains nuts and ground flaxseed to boost it’s nutritional content.


Ingredients

1 stick (1/2 cup) butter*

1/3 cup brown sugar (not packed)

1/4 cup coconut nectar

2 cups quick cooking gluten-free oats

1/2 cup walnuts or pecans, finely chopped

1/4 tsp salt

1/2 tsp pure vanilla extract

1/4 tsp ground cinnamon

1/8 tsp ground cardamon

1/3 cup ground flaxseed

*I haven’t yet tried making these with coconut oil, but plan to shortly. I don’t think a straight substitution would work; it would probably require slightly less than 1/2 cup.


Preparation

Heat the oven to 350F.

Line an 8×8-inch baking dish with parchment paper.

In a medium-size saucepan, melt the butter on medium-low heat. Once the butter has melted, stir in the brown sugar, coconut nectar, salt and vanilla. Stir until everything has melted and blended. Stir in the remaining ingredients and mix until thoroughly combined.

oat mixoat press


Spoon out into the baking dish, and spread evenly. Pat down with the back of a large, fairly flat spoon. (I use one of my large serving spoons.) Place in the oven and bake for 23-25 minutes or until golden brown on the edges.

Allow to cool for 20 minutes before cutting in quarters, then cut each quarter diagonally for the traditional triangle-shaped flapjack.


Enjoy!

Read Full Post »

rice aboverice close

OK, so you might think from the photo that this post will share a taco recipe. It’s true, I make some sort of taco every week for my family. They love them, no matter what I stuff in them–prawns, beef, chicken, fish, etc.) You might also think using superlatives such as “best” is a bad idea, but this really is the best Mexican rice I’ve ever had–at least compared with what we call “Mexican rice” here in the United States and all the way down to Central Mexico.

The recipe (slightly modified) comes from Maui Taco, on the island of Maui where my mom was born and raised. Even though it’s grown more crowded and touristy, I still love visiting the island, and I try to go as often as i can. Even though the roads sport more cars, and my favorite “secret” (known only by locals) snorkeling spot now has a resort built to the edge of the sand, the waters are still turquoise blue and warm, and I still know where to go for a guaranteed swim with huge gentle sea turtles.

But back to the food! After a few hours of snorkeling and playing in the surf and sand, my family heads to Maui Taco for a quick bite. The fish tacos are simple but flavorful, and when accompanied by rice and beans, they make a full meal. The nice folks at Maui Taco shared this recipe with me years ago, and I’ve been making it ever since. For some reason, I just now thought to share it with others.

It’s surprisingly simple, incredibly flavorful and versatile. You can serve it alongside tacos as I’ve shown here or put it in a larger wrap when making burritos. You can top a bit of it with a fried egg, some sliced avocado and a little salsa or hot sauce for a satisfying breakfast. You can serve it with all the taco/burrito fixings over lettuce and make a healthy taco salad. I actually like it so much that I will eat a bowl all by itself in lieu of dessert.

I served the rice pictured here with tacos filled with meatless “Beefy Crumble,”  radish micro greens, sliced avocado and fresh salsa. I’m not a huge fan of faux meat, but I really like the ground beef substitute by Beyond Meat. We get the “Feisty” version which is very flavorful and made with pea protein (instead of soy, which as you may know, I generally avoid).

rice angle

taco


Ingredients

3 tbsp extra-virgin olive oil

1/2 cup red onion, finely diced

2-3 garlic cloves, minced or crushed

1 cup long-grain rice

1 1/2 tbsp tomato paste

3 cups organic (or homemade!) chicken stock*

Sea salt to taste


Preparation

Heat the oil in a 12-inch cast-iron or similar skillet over medium heat. Add in the onions and a pinch of salt. Cook until the onion softens and begins to turn translucent. Add in the garlic and cook, stirring regularly, for another 2-3 minutes.

Push the onion/garlic mixture to the edge of the pan and add in the rice. Cook, stirring occasionally until the rice begins to brown a little. Stir in the tomato paste until fairly well-blended. Slowly stir in the chicken (or veg) stock. Bring to a boil. Turn down the heat and simmer the rice covered for 20 minutes. Stir and season to taste with salt.

Serve immediately or at room temperature. Store leftovers in an airtight container for up to three days.

Enjoy!

Read Full Post »

cashew above2cashwew side


This smoothie is for those days you wake up and simply aren’t excited for a glass of greens, or eggs and bacon, or whatever you usual go-to breakfast is. It’s the kind of drink you want when life has been hectic and you want something soothing and nurturing both in nutrients and taste. Because this smoothie tastes like a dessert to me, I probably make it more often than I should (if you believe too many nuts is a bad thing!).

I’ve been experimenting a lot with cashews lately, and I hope to post some of the winning recipes here soon. Cashews make everything better, in my opinion. They impart a delicious creaminess that many think is only achievable with dairy products. I’ve been trying some cheesecake recipes that are completely vegan. They’ve all been delicious, but I’m just tweaking the recipes to get them right before sharing.

I love this shake because it feels like a warm hug even though it’s cold and creamy. It’s naturally sweet from the banana and dates, and the cardamon adds just a touch of unexpected flavor that lets your mind to travel to distant lands. (OK, you’re wondering *what* else is she putting in her shake?! But I’m serious, sip this drink in a quiet room and your mind might just conjure up images from A Passage to India, The English Patient, or Lawrence of Arabia.)


Ingredients

1 cup filtered water or coconut water

1/3 cup raw, unsalted cashews

1/2 a banana, peeled

1 tsp pure vanilla extract

2 Medjool dates, pitted

1/4 tsp ground cardamon

The tiniest pinch of salt

3-4 ice cubes


Preparation

Whizz everything together in a high-powered blender until smooth and creamy. If it’s too thick for your taste, thin with a little more water or ice.

Sit back and enjoy!

Read Full Post »

lentil above2lentil close

I recently had the pleasure of cooking dinner, at a lovely home in Santa Cruz overlooking the ocean, with a friend whose husband and young son are primarily vegetarian. It reminded me that I tend to cook in a distinct pattern. That is, I usually prepare a meat-based entree served with a cooked vegetable side and a green salad. Healthy, yes, but a little boring in its repetition. The evening I cooked with the above mentioned friend, we served steak (the meat entree), along with four or five vegetable dishes, which combined for a great meal. Not that any of us have time to whip up six dishes for every dinner, but it got me thinking… I want to cook more vegetarian dishes not just cook more vegetables.

One of the dishes my friend made that evening is this lentil salad. She said the recipe comes from the genius Ottolenghi team, but I couldn’t find it in any of their books. My friend didn’t use precise measurements, but I’ve tried to capture fairly precise measurements based on my own taste. It’s definitely one of those dishes you can make, then taste, adjust, taste again, etc. However, I have included the measurements for the dish as I like it (since I’ve already made it three times in the past two weeks).

The combination of flavors and textures surprises and delights. I also love the different colors even though the main ingredient–French lentils, is an uninteresting greenish-brown. And while sun-dried tomatoes seem strong-flavored on their own, as does gorgonzola cheese, they blend perfectly together in a surprisingly mild, yet still very flavorful way.

I also think this dish works with just about anything. We served it with steak, but it would have been a great accompaniment to roasted chicken or grilled halibut or any vegetarian dish.


Ingredients

3 cups cooked French lentils*

1 cup fresh pomegranate seeds

3/4 cup sun-dried tomatoes, roughly chopped, plus a little oil from the jar

1/2 cup gorgonzola cheese, crumbled

2 tbsp fresh dill, thick stems removed and leaves chopped

2 tbsp fresh chives, snipped or cut in small lengths

2 tbsp fresh flat-leaf parsley, chopped

Coarse-ground sea salt

Fresh-ground pepper

Extra-virgin olive oil

*If you happen to live near a Trader Joe’s store, they sell steamed lentils in the produce section. Cooking your own is always better, but in a hurry, the pre-cooked lentils make this dish a cinch to prepare!


Preparation

Mix everything together in a large bowl. Drizzle a little olive oil, season to taste and stir to incorporate. Serve at room temperature.


Enjoy!


lentil above

Read Full Post »

zucc verticalzucc close


I don’t know what’s at the root of my latest obsession with zucchini, but I find myself wanting to discover more and more ways to cook the tender, dark green squash. Maybe it’s because I feel they’re an under-appreciated vegetable. Zucchini may not provide a lot of protein or fiber, but they’re very low in fat and carbs (for people watching their weight) and are a rich source of poly-phenolic antioxidants which help fight damage from free radicals. We all can remember someone serving us slices of zucchini, horribly over-cooked in a steamer to the point of sogginess, with absolutely zero flavor. But when zucchini is cooked properly, it’s delicious and goes with any number of meats or other vegetables. Zucchini soup is one of my family’s favorites, as is zucchini bread, and I regularly make zucchini and potato pancakes as a base for smoked salmon and apply chutney.

These fritters are so flavorful, you don’t need to top them with anything except a dollop of spiced yogurt. A fried egg served on top would also be delicious (probably not with the spiced yogurt though). I appreciate that you can eat these for breakfast, lunch or dinner–they’re very versatile! And I like that this recipe is gluten- and grain-free–perfect for people following a Paleo diet or simply trying to reduce the amount of grain they consume.


Ingredients

2 medium zucchini, washed and ends removed

Coarse-ground salt

1 organic egg

2-3 tbsp almond flour/meal

1 tbsp coconut flour

1 tbsp fresh parsley, finely chopped

2 scallions, thinly sliced, white parts and a little of the green

2-3 tbsp extra-virgin olive oil

Fresh-ground pepper

2 tbsp grated Parmesan cheese, optional


Spiced yogurt

1/2 cup plain Greek yogurt

2 small garlic cloves, crushed

1/2 tsp sea salt

1 tbsp extra-virgin olive oil

2 tsp fresh lemon juice

Fresh-ground pepper


Preparation

Grate the zucchini on the large, round setting. Spread out on a colander, sprinkle with salt and allow to sit for 10 minutes. Squeeze out the excess liquid and place in a medium bowl. Stir in the egg, parsley, scallions and almond flour and coconut flour. Season with salt and pepper and stir until well-mixed.


zucc pan

Heat olive oil in a large cast-iron or other skillet over medium heat. Make sure there’s enough oil to cover the bottom with a shiny layer. Spoon the zucchini mixture into the skillet using a large tablespoon or soup spoon. It should make 4-6 fritters depending on how big a spoonful you use. You may need to cook them in batches. Fry for 4-5 minutes on each side or until golden brown (or even slightly browner so you get a nice crunch on the outer edges). Transfer to a plate lined with a paper-towel.

While the first batch of fritters is cooking, mix together the spiced yogurt mixture in a small bowl.

When the fritters are done, serve them warm with a dollop of spiced yogurt on top.


Enjoy!

SaveSave

Read Full Post »

« Newer Posts - Older Posts »

Cooking Without Limits

Food Photography & Recipes

Selma's Table

Life doesn't have to be perfect to be wonderful - stories and recipes from a wonderful life...