Feeds:
Posts
Comments

Archive for the ‘Recipes’ Category

lemon cake abovelemon cake closeOlive oil cakes are essentially the only cakes I eat any more. They tend to have more flavor, better texture and less “saccharin” sweetness than regular cakes. I usually make exceptions for the kids’ birthdays by baking them my favorite gluten-free birthday cake (which uses butter or olive oil), in which case I use butter.

I astonished myself last weekend when I suddenly realized–more like discovered, I’ve never shared my favorite olive oil cake recipe (with rosemary and chocolate) on this site. Shame on me! I have two birthday cakes to bake in the next three weeks, but I will get the favorite recipe up in the next month or so.

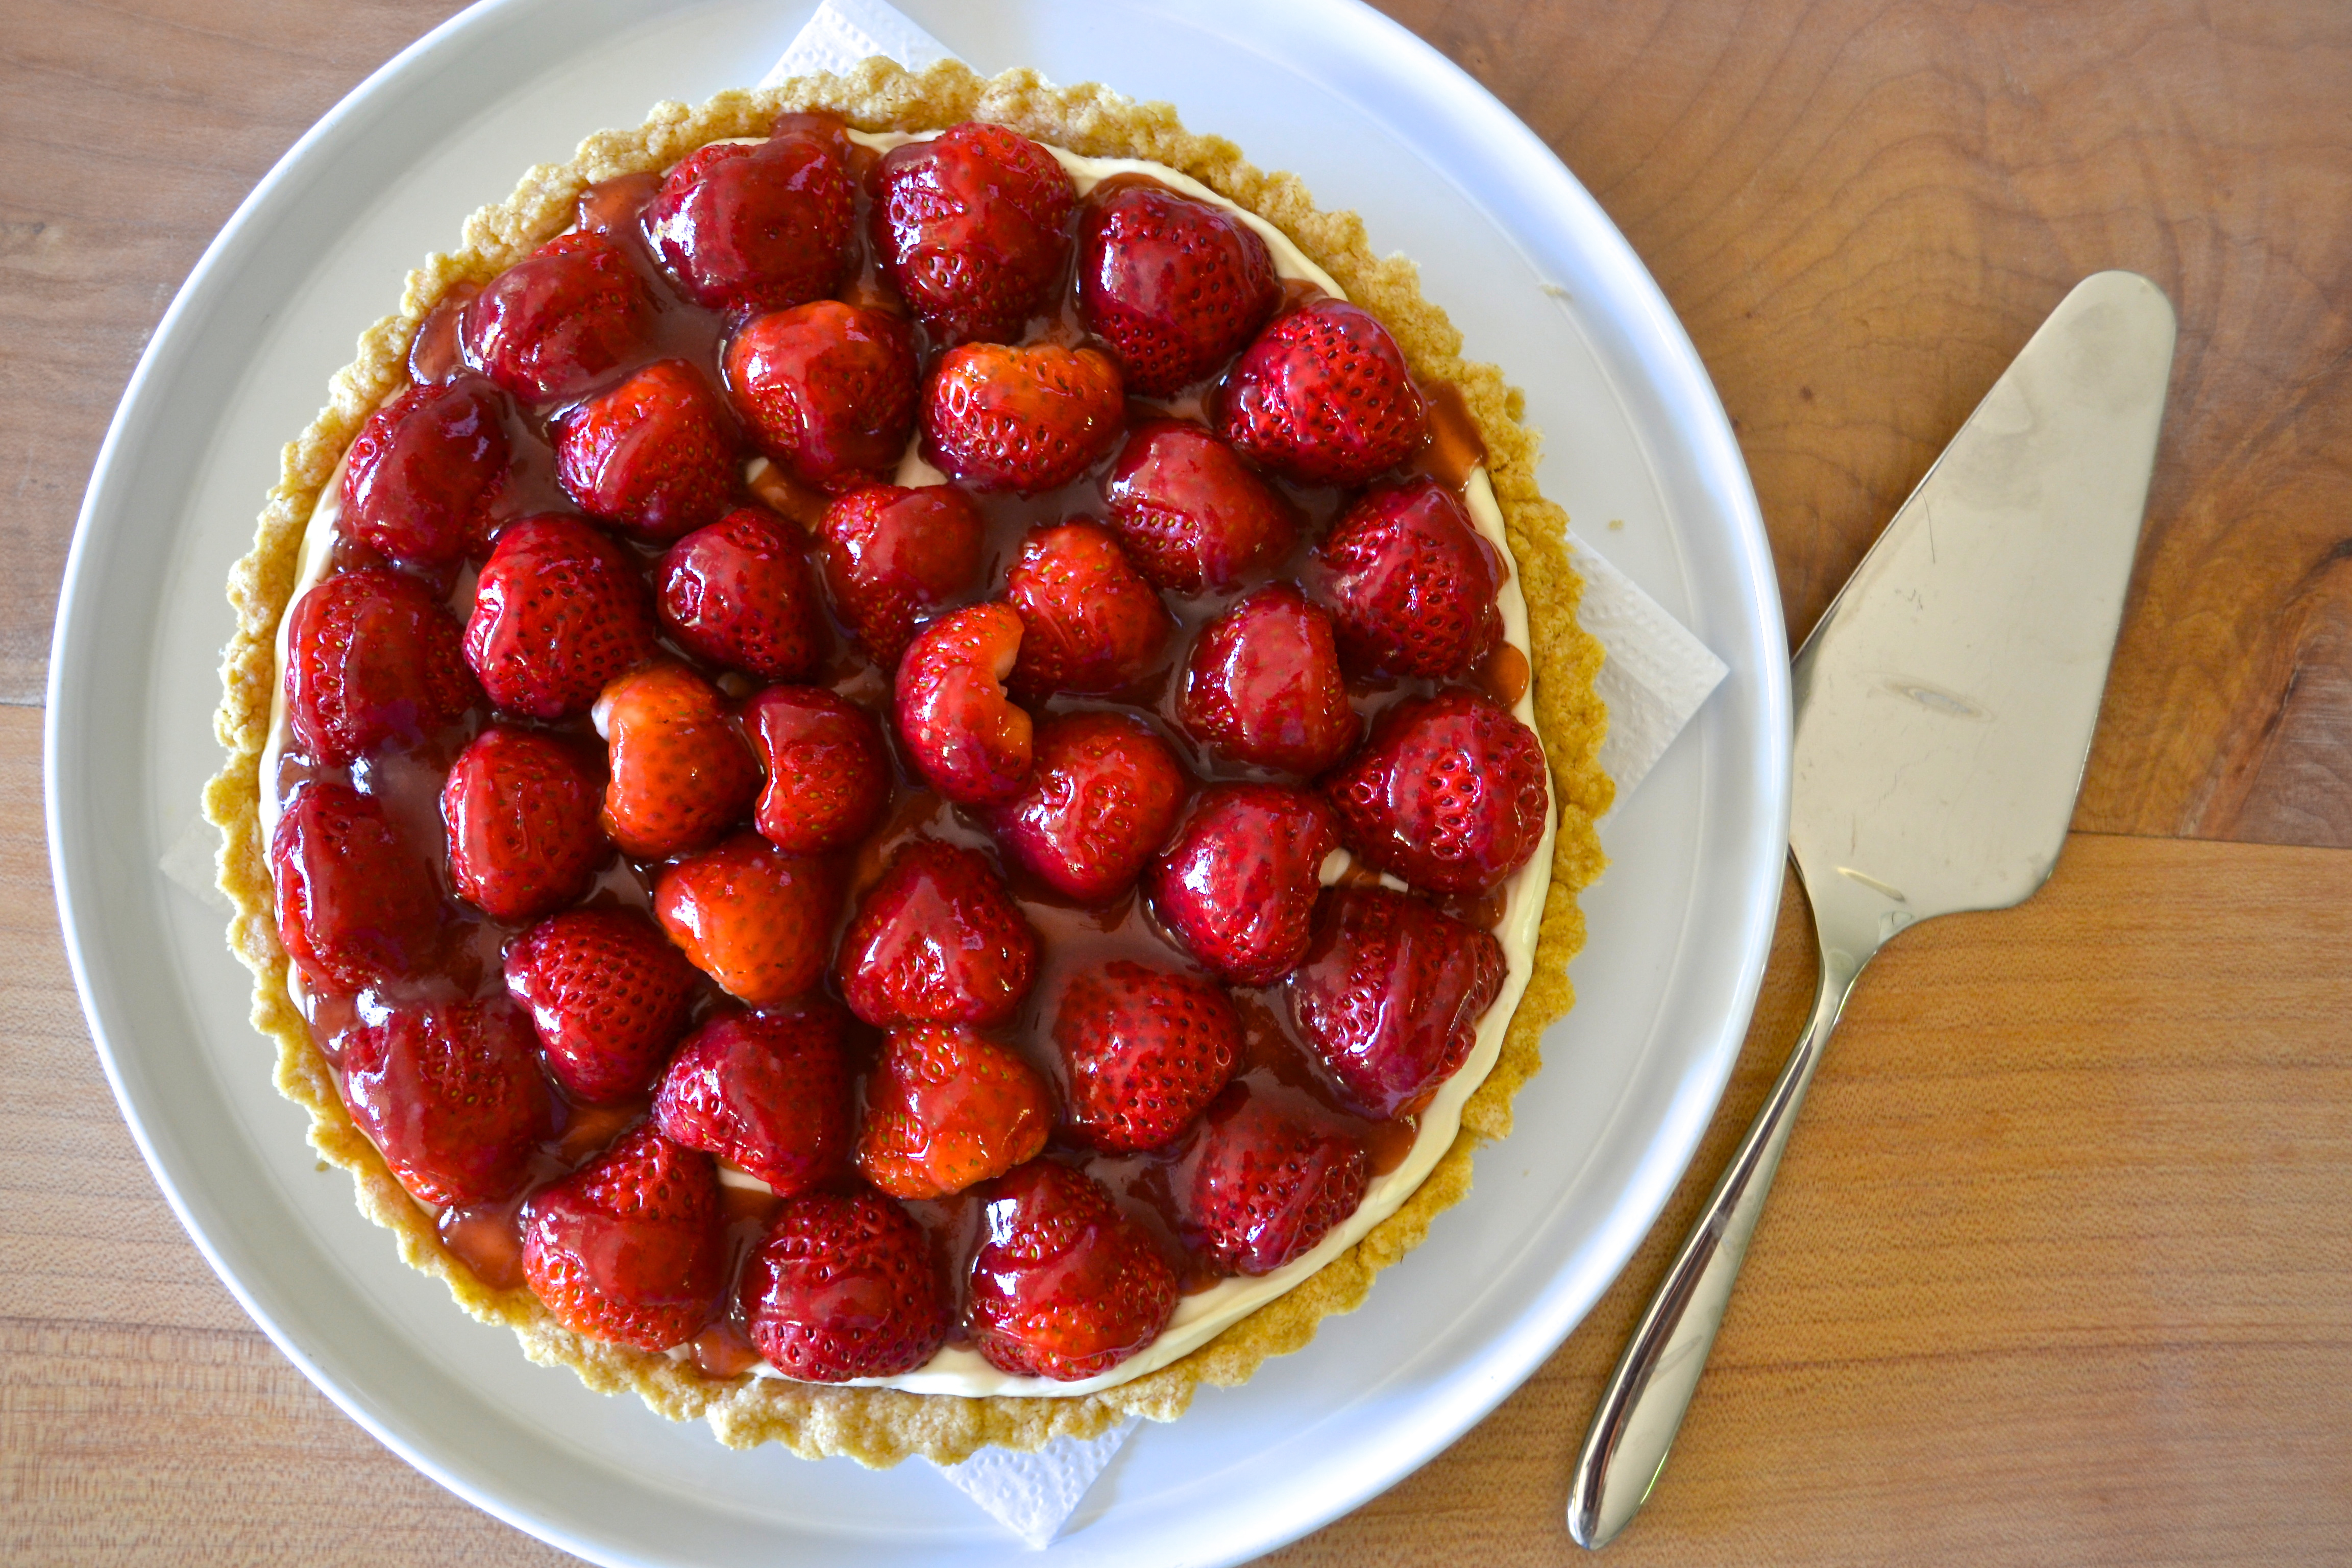
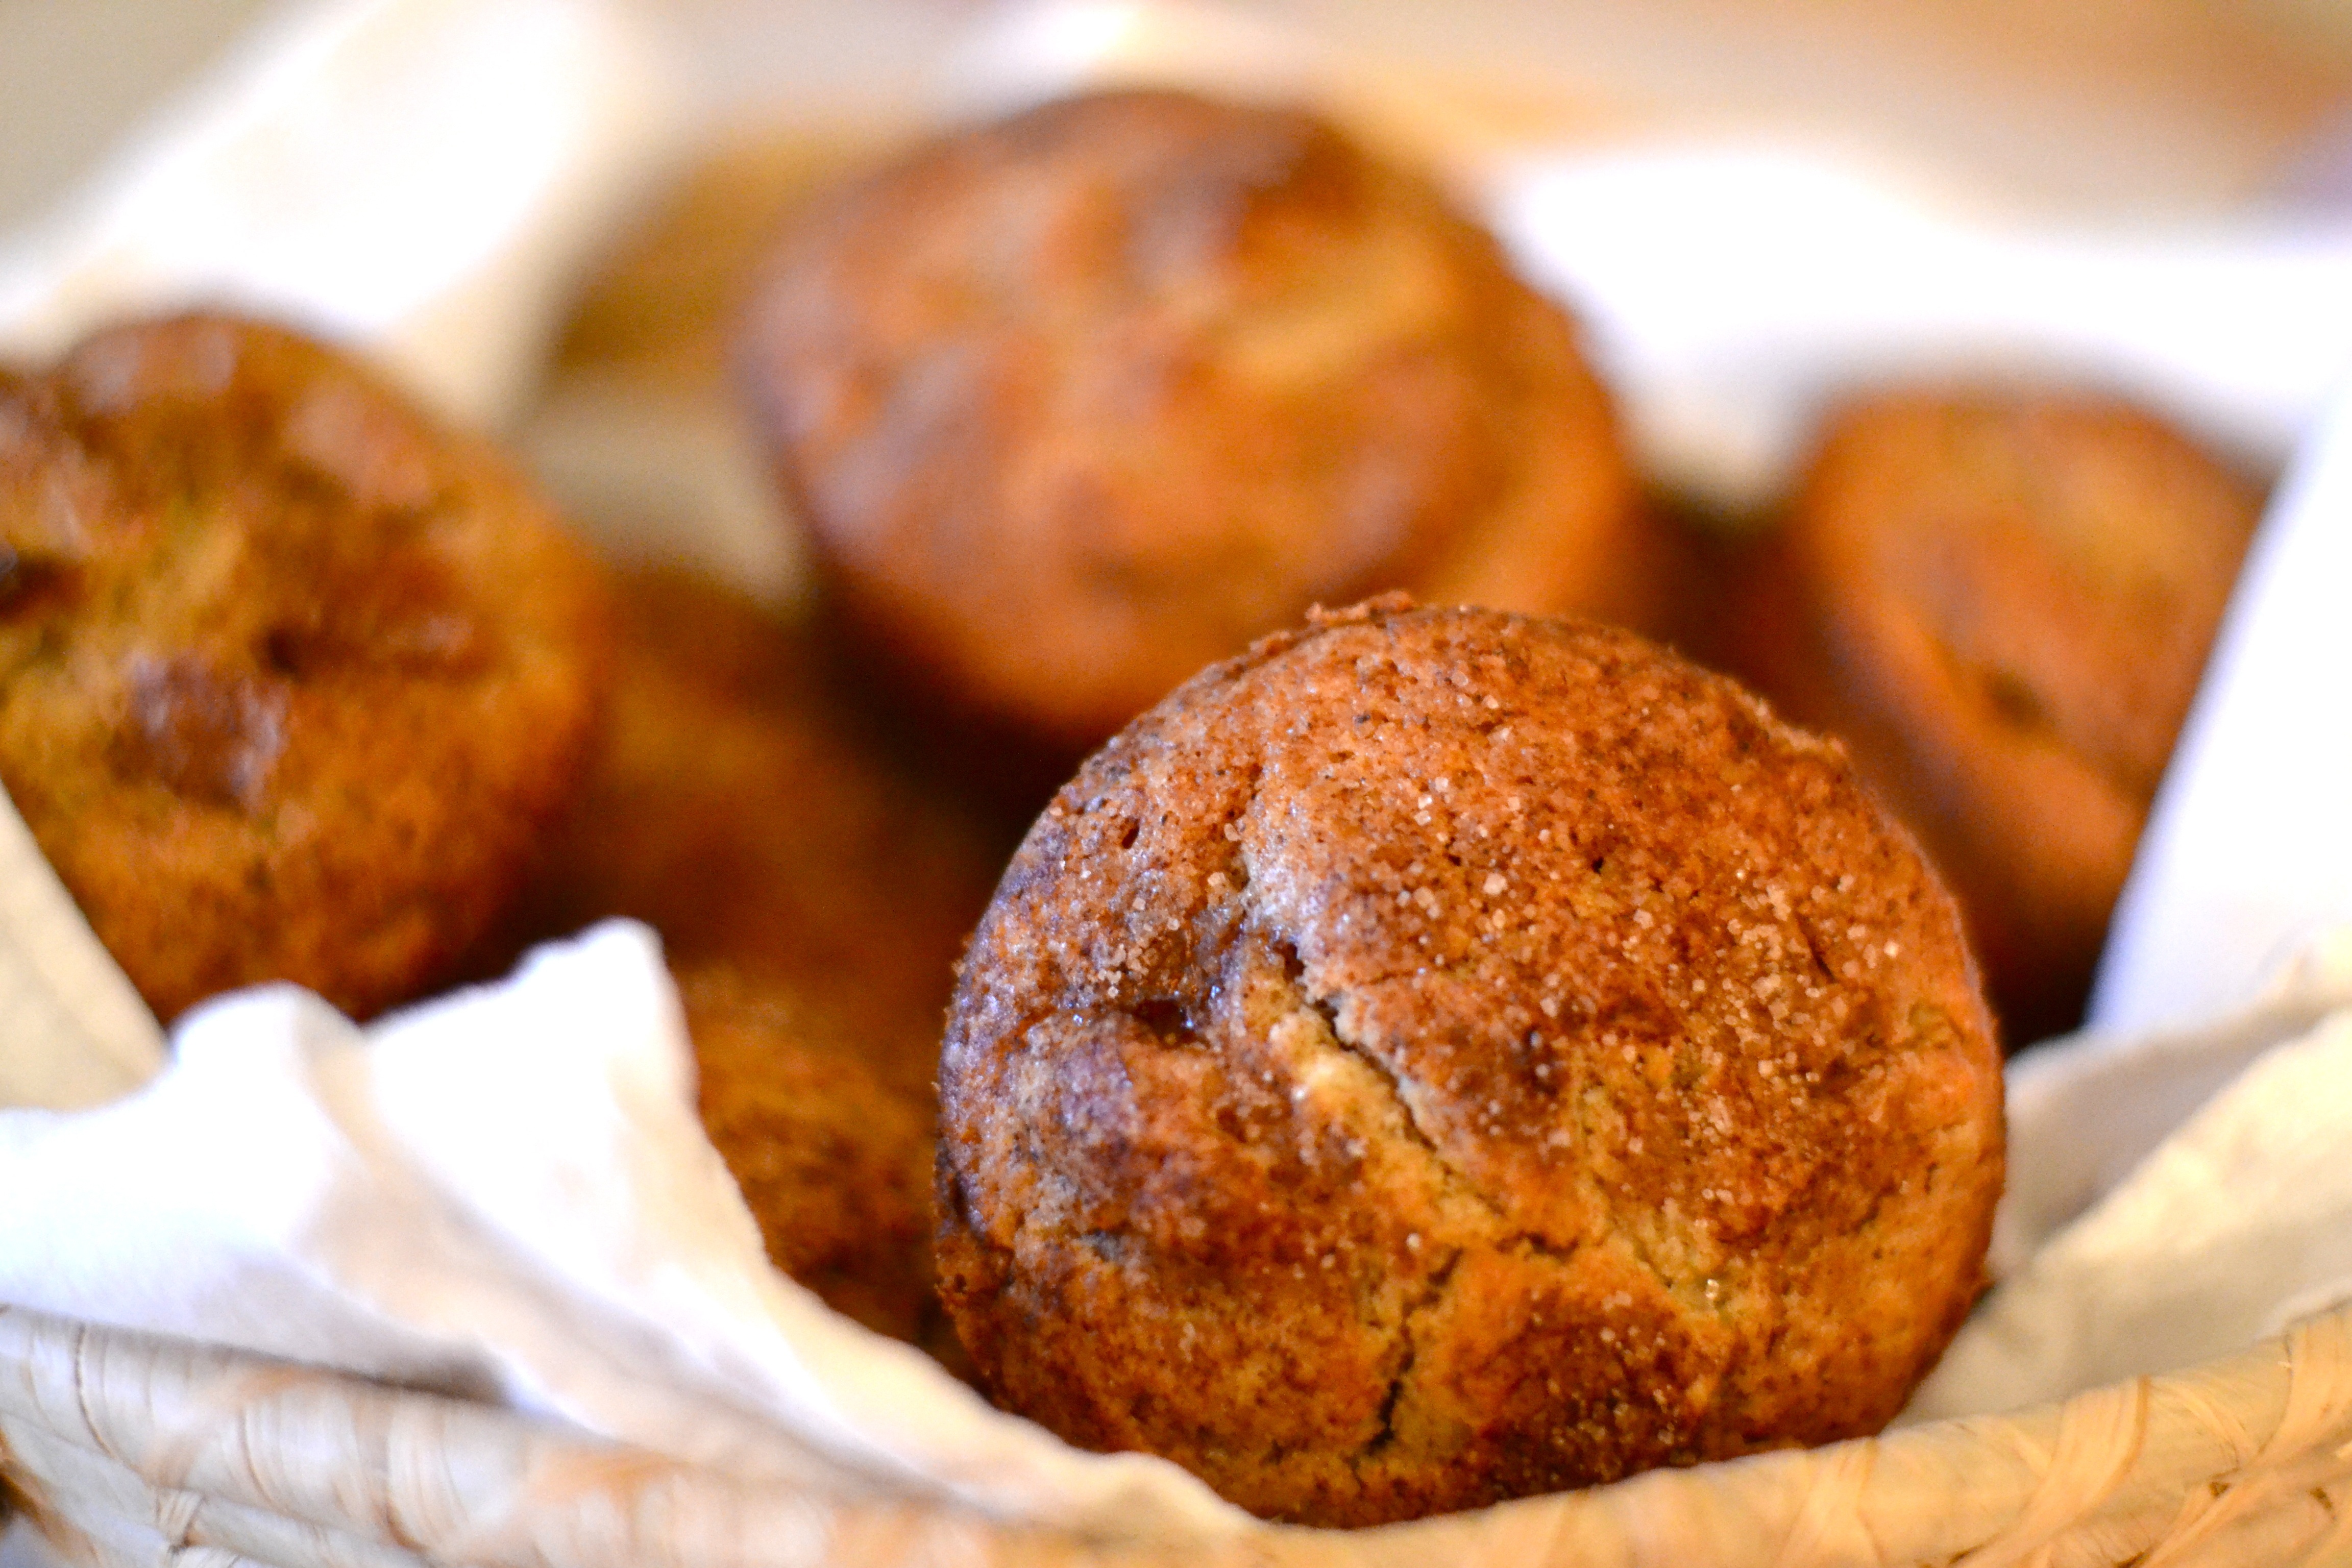
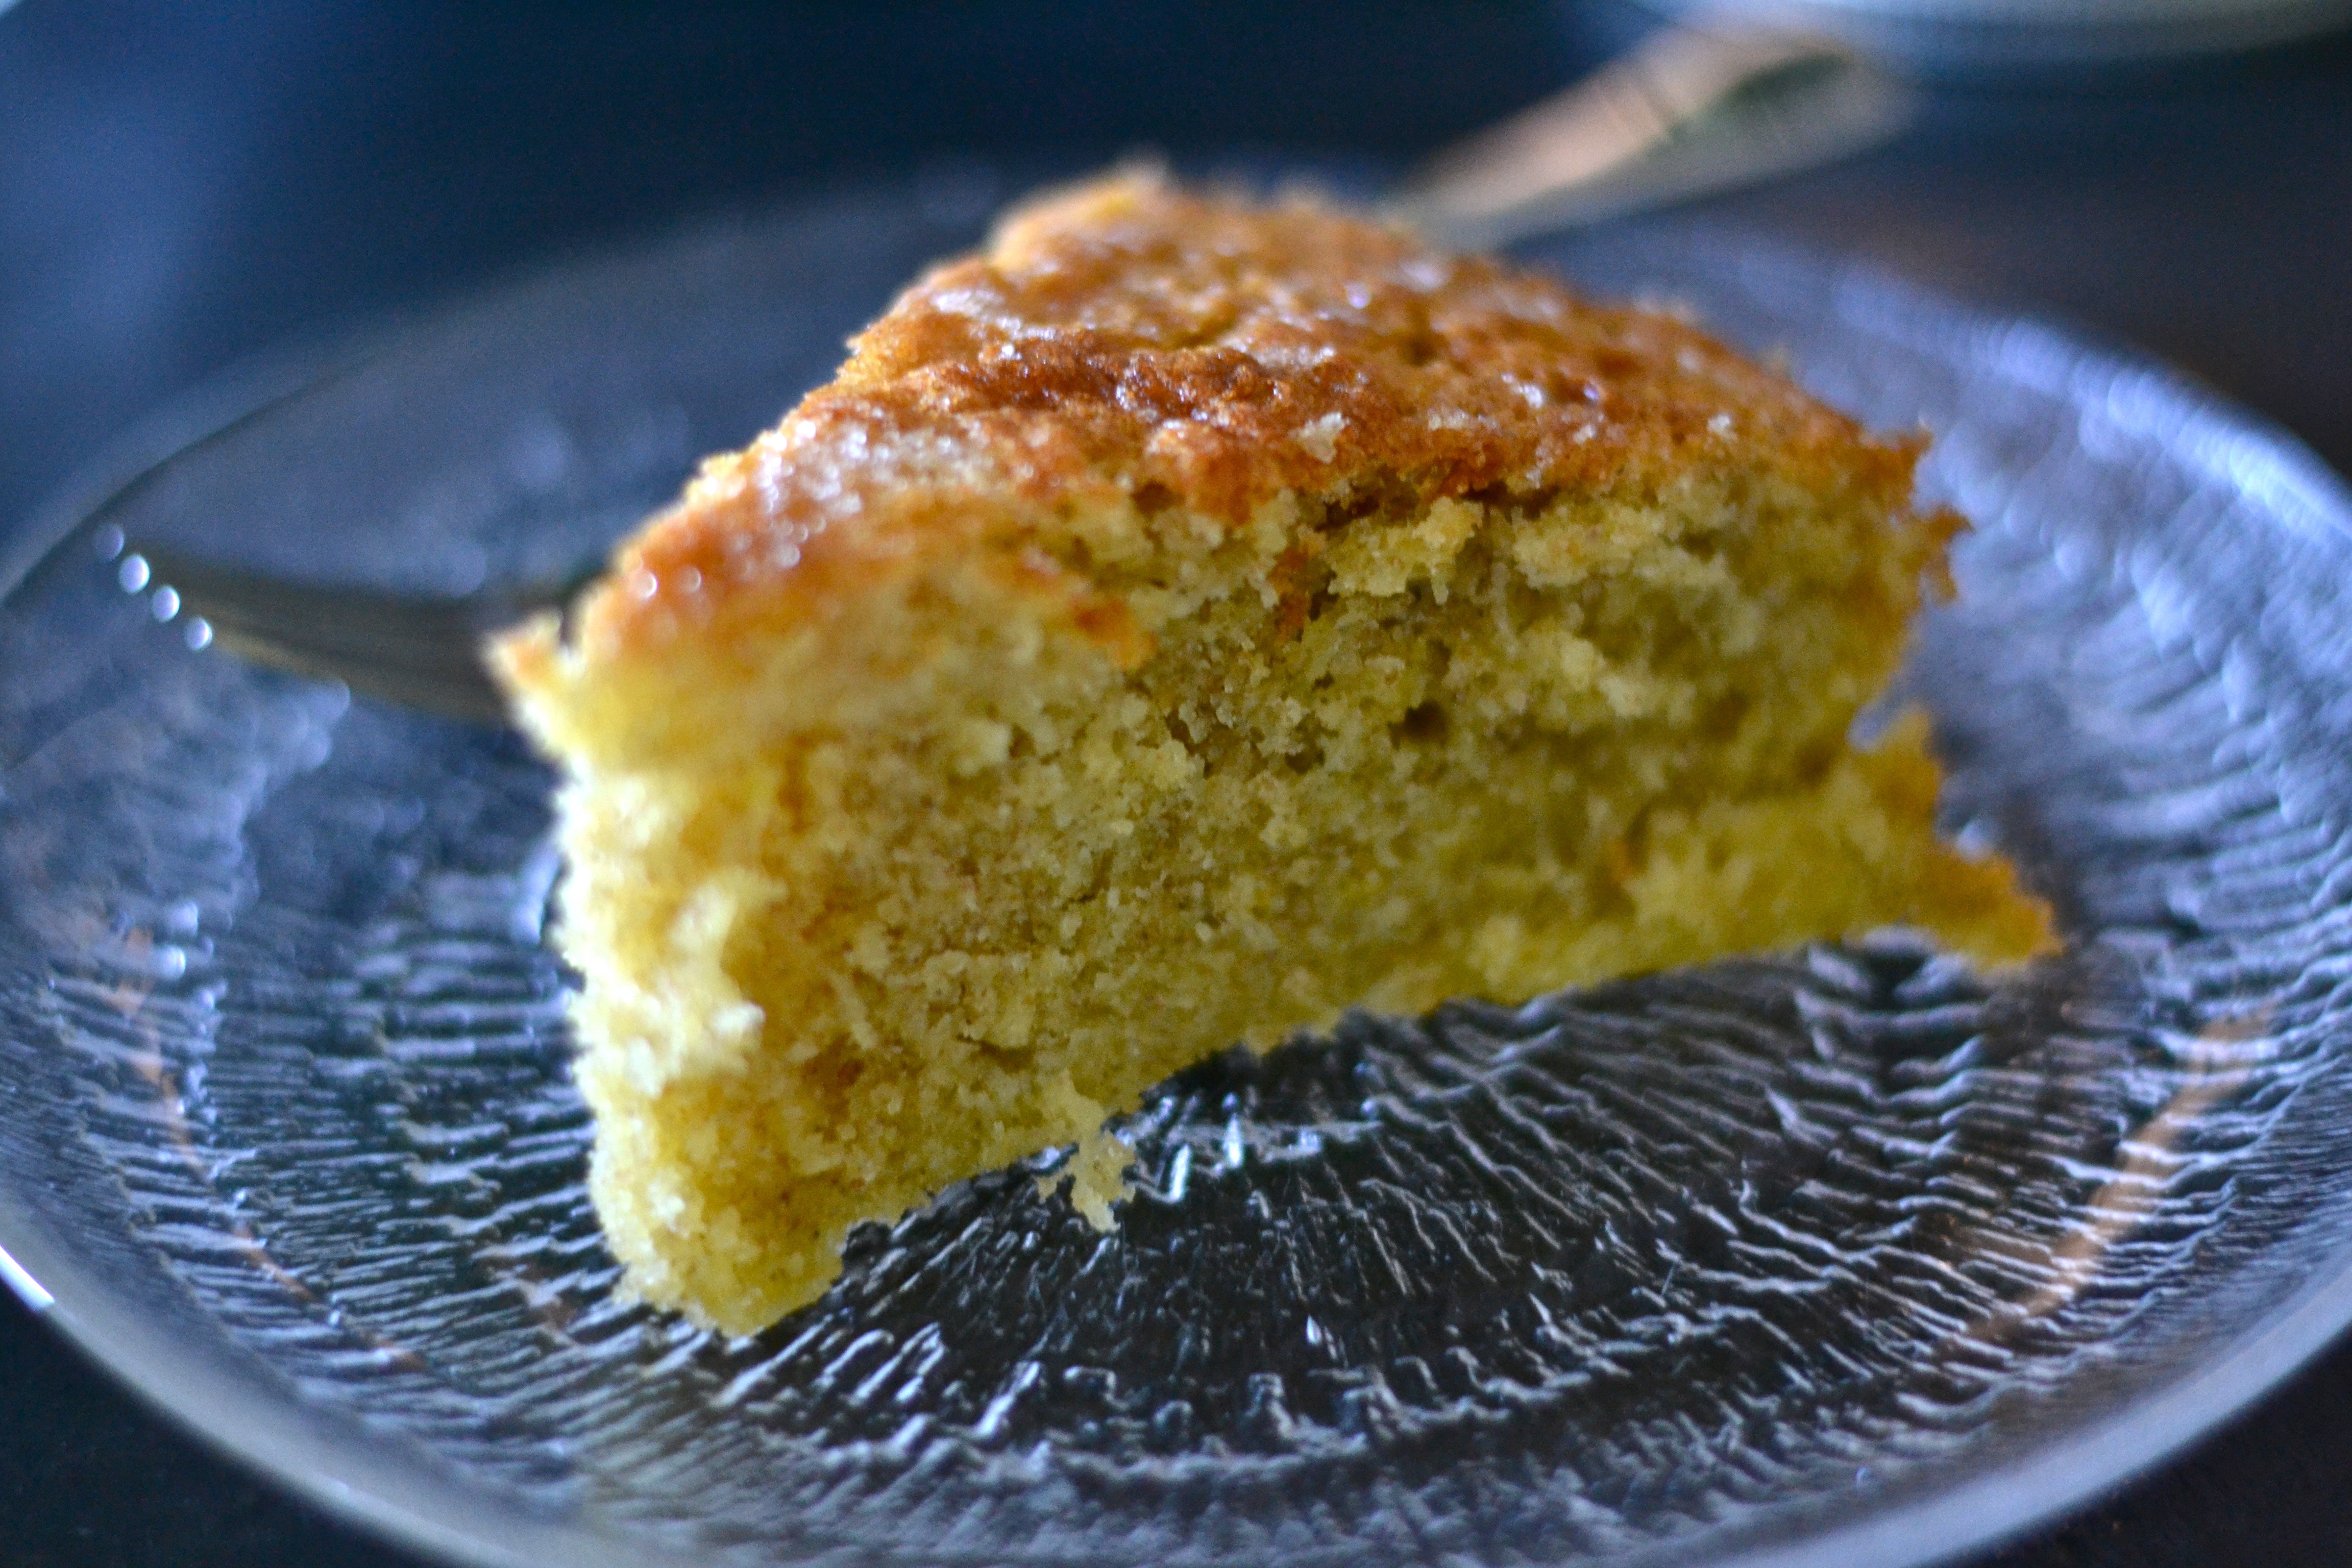
In the meantime, try this easy recipe for a deliciously moist and flavorful cake that goes with anything and can be served any time. It has wonderful texture and a subtle lemon flavor.


Ingredients

Cake:

1 cup all purpose flour

1 cup whole grain spelt flour

3/4 cup sugar

1 tsp sea salt

1/2 tsp baking powder

1/2 tsp baking soda

1 1/3 cup olive oil (I used extra-virgin but regular would tone down the olive oil taste if you prefer that)

1 1/4 cup milk of your choice (I used a combo of cow and coconut, but you can make the cake dairy-free by using all coconut or a combination of milk “substitutes”)

3 large eggs

2 tsp grated lemon zest

2 tbsp fresh lemon juice

Glaze:

2 tbsp sugar

2 tbsp fresh lemon juice


Preparation

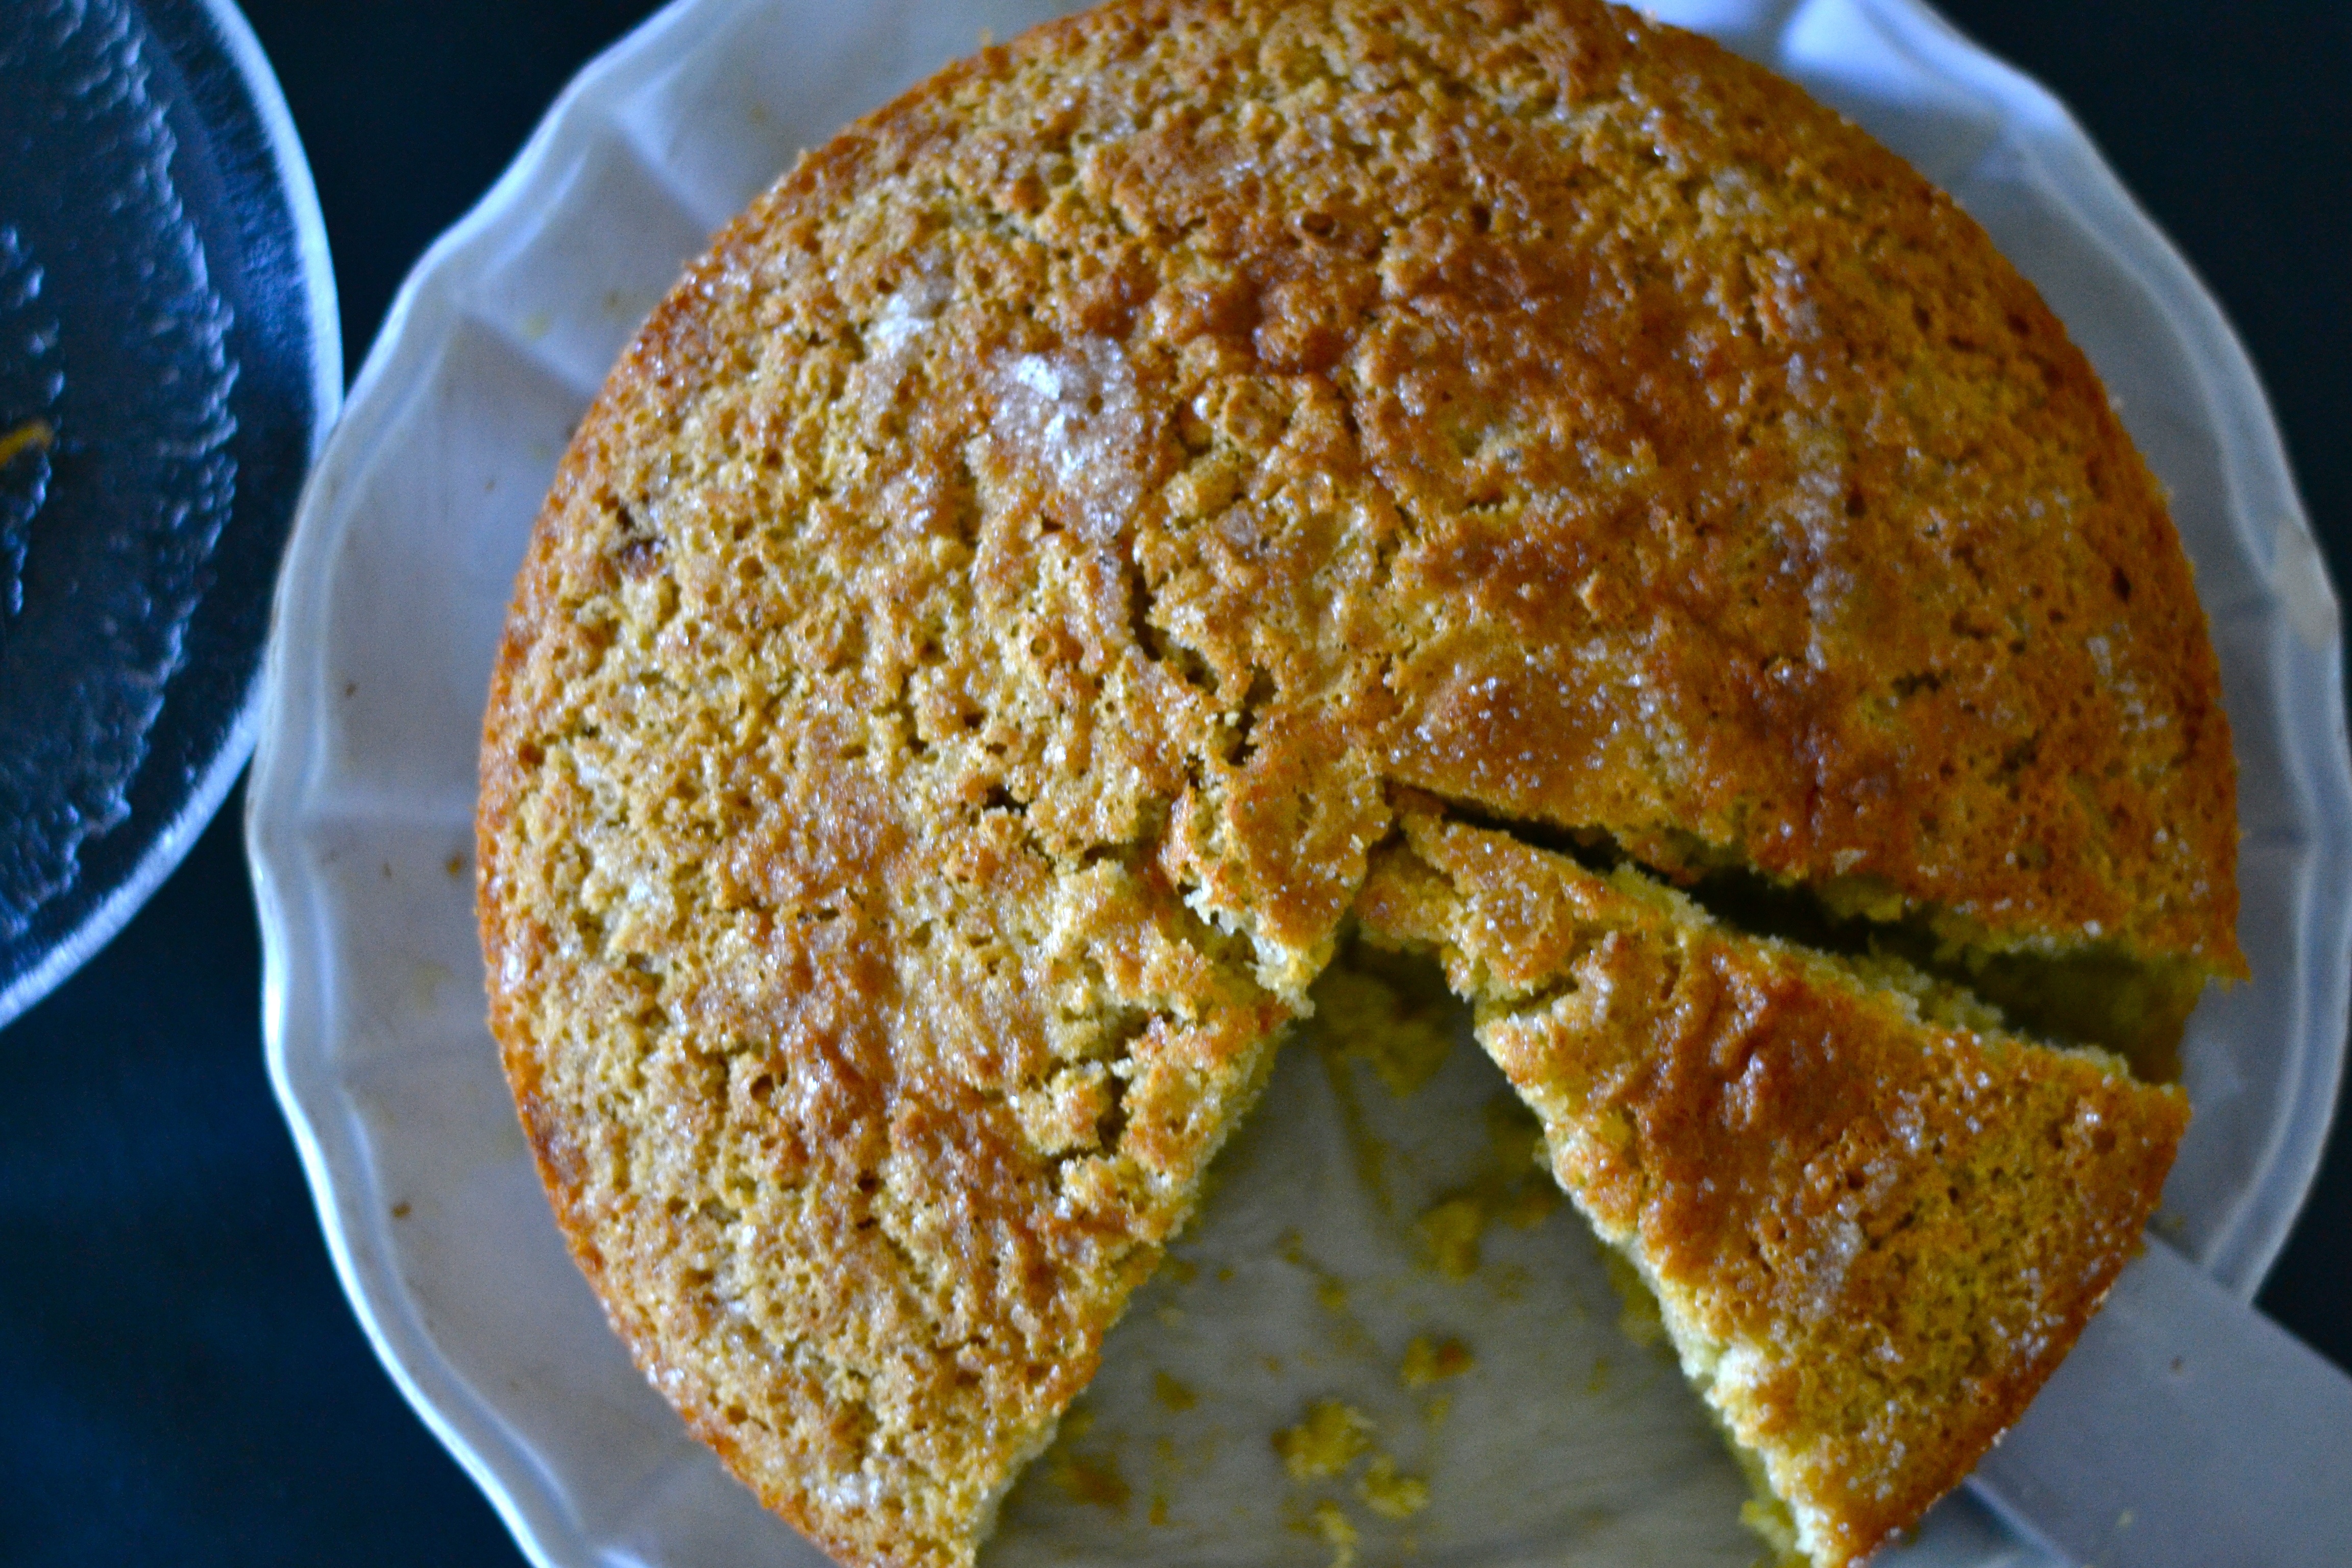
Heat oven to 350F. Lightly oil a 9-inch cake pan (use one that’s 2″ tall). Insert a disk of parchment paper on the bottom.

In a medium-size bowl, whisk together the flours, salt, baking soda, baking powder and sugar. Set aside.

In a large bowl, whisk the eggs, then add in the olive oil, milk(s), lemon zest and lemon juice, whisking to blend after each addition.

Whisk the dry ingredients into the wet, whisk only until incorporated. (Do not over blend!) Pour into the prepared cake tin and place in middle of the oven. Bake for 55 minutes to 1 hour or until a toothpick inserted in the middle comes out clean.

When the cake has baked, remove it from the oven and set it on a rack to cool. In a small bowl, whisk together the remaining 2 tbsp sugar and 2 tbsp lemon juice and drizzle the mixture over the cake.

Let cool to room temperature before serving. Note, this cake is its most “cake-like” when it’s still warm from the oven, but the flavors are better incorporated when it’s served at room temperature. You choose!


Let us eat cake!

Read Full Post »

ice cream


Do you like the title of this posting? It contains three of my favorite words!

Seriously, if you live in the U.S., you’re probably experiencing unseasonably warm temperatures right now. Here in Northern California it’s downright blazing hot–at least in my part of the Bay Area just north of the Golden Gate Bridge.

We don’t have a swimming pool in our yard, and I’ve been too busy to drive my little ones to the beach to cool off. But I want to appease the little monkeys some way, and this super easy to make, healthy ice-cream (slightly modified from Nom Nom Paleo’s) does the trick. It literally takes less than 5 minutes to prepare (if you have frozen fruit) and they love it. We all love it. What’s more, it’s dairy-free and contains no added sugar!

I also love that it doesn’t “violate” our Sweet Sunday rule, so when my children ask, “Mama, can we have some of that ice cream?” I can feel perfectly good always answering “Yes!”

I’ve made two flavor suggestions here, but obviously you can make whatever flavor or combination of flavors you and your family like. I don’t happen to have any frozen mango, but that will be my next flavor to try.

ice cream blue


Ingredients

1/2 cup coconut milk (I recommend Native Forest)

2-3 frozen bananas (I keep a large stash in the fridge at all times now)

1 cup frozen strawberries (or frozen blueberries or other fruit of your choice)

1 1/2 tsp pure vanilla extract


Preparation

Place all ingredients in a VitaMix or other high-powered blender. Using the “plunger” tool, blend the ingredients until thick and creamy. Serve immediately.

Serves 4.


Stay cool!

Read Full Post »

cel root closecel root above


Cooking for your mother or someone else’s this weekend? Consider serving this dish alongside an herb-roasted chicken or grilled salmon. Both dishes are insanely simple to make but will impress even regular consumers of haute cuisine. And if you want to impress that mother even more, consider finishing the meal with a simple to make but beautiful strawberry tart (recipe here)!

straw tart whole

I’m still getting celery roots in my weekly organic produce box, and I haven’t yet tired of the funky-looking vegetable. There’s something warm and comforting about the taste and texture of dishes made with celery root, yet the taste and texture is light and refreshing enough to serve on a hot day with grilled meats and vegetables.


Ingredients

2 bunches asparagus with tightly closed tips, washed and trimmed

Zest of 1 lemon

Extra-virgin olive oil

1 head celery root, peeled and cut into 3/4-inch cubes (roughly)

1 large shallot, peeled, trimmed and thinly sliced

2 garlic cloves, finely chopped

1 cup milk (I use coconut, but cow’s or almond is fine)

Sea salt

Fresh ground pepper


Preparation

Preheat oven to 400F.

cel root grill

Scatter asparagus spears over a rimmed baking sheet. Drizzle with olive oil. Sprinkle the lemon zest, a pinch or two of salt and a few grinds of pepper. Place in the oven and cook, stirring once or twice, until the spears are bright green and the tips are beginning to char, about 15 minutes.

Meanwhile, heat 1 tbsp olive oil in a large cast-iron or other skillet over low heat. Add in the shallot and garlic and allow the mixture to “sweat” for about 5 minutes, or until the shallot slices turn translucent. Add in the celery root and milk of your choice, and turn up the heat to medium. Add in 1 tsp sea salt, cover and simmer until the celery root is soft.

cel root pan

Transfer the celery root mixture to a blender and process until it’s wonderfully creamy. Spoon the puree over 4 plates or low bowls and top with the asparagus. For a finishing touch, add a drizzle of olive oil or truffle oil and/or a squeeze of fresh lemon juice.

Serve immediately.

Enjoy!


Read Full Post »

fudge abovefudge closeI’m officially addicted to this stuff!

It tastes incredibly rich and creamy and satisfyingly sweet, yet I have no guilt eating it! Packed with heart-healthy nut oils and containing very little sweetener, this nutty fudge tastes like a dessert but can be eaten any time.

It’s also super easy to make–about 5 minutes of actual “work” plus time to chill in the refrigerator.  Lately, I always have some on hand in the fridge for when I’m craving something sweet, or when I simply need a quick but filling snack. It immediately staves off hunger pains.


Ingredients

1/2 cup raw cocoa butter, melted

1/2 cup coconut oil, melted

1/4 cup raw almond butter

1/4 cup raw cashew butter

1 1/2 tbsp pure maple syrup or raw honey

2 tsp pure vanilla extract

1 pinch of sea salt

1 cup macadamia nuts, roughly chopped*

*Variation: 1/2 cup macadamia nuts (roughly chopped) and 1/4 cup Enjoy Life Vegan Chocolate Chips


fudge choc


Preparation

Prepare a standard loaf pan by inserting a length of parchment paper into the pan. Fold the excess paper accordingly so you essentially have a paper-lined loaf pan.

fudge stir

Put the almond and cashew butter in a medium-size mixing bowl. Add in the maple syrup (or honey), vanilla extract and about 1/4 cup of the melted cocoa butter/oil mixture. Whisk together until well blended. The heat from the melted oil will help soften the nut butters and allow you to mix them easily. Whisk in the remaining melted mixture. Stir in the nuts (or nuts and chocolate chips).

fudge mix

fudge pan

Pour the whole mixture into the prepared loaf pan and put in the refrigerator to solidify. Chill until very hard, about 2 hours for best results.


When ready, simply lift out the paper “cup” and set it on a cutting board. Slice the fudge into 1-inch chunks and store in the fridge in an airtight container. Serve chilled.

fudge slab

Enjoy!

fudge hand

Read Full Post »

c soup aboveCelery root happens to be one of those often forgotten vegetables that’s really quite delicious–just rarely on our minds. Celery roots are also rather ugly, hence, you’ll notice there’s no photograph of one here. (I tried!) But they also offer good amounts of potassium, Vitamin C and Vitamin B-6.

This odd-looking vegetable makes a delicious, thick and creamy soup, so I thought I’d share a recipe I like.


c soup eatIngredients

1 1/2 tbsp extra-virgin olive oil, plus more for drizzling

2 leeks, white and light green parts thinly sliced and washed carefully

1 to 1 1/2 lbs celery root, peeled and cut into 1-inch chunks

6 oz Yukon Gold potatoes, peeled and cut into 1-inch chunks

1 medium apple, peeled, cored and cut into 1-inch chunks

1 garlic clove, minced

1 tsp sea salt

fresh-ground pepper

1 cup water

1 1/2 cup low-sodium chicken broth (preferably homemade)

1/4 cup coconut milk (or almond or cows milk)


Preparation (30 minutes)

Heat 1 1/2 tbsp olive oil in a large skillet or saucepan over medium heat. Add in the leeks and let them “sweat,” stirring occasionally for 3-5 minutes until they become soft and translucent. Stir in the garlic and cook for another minute or two.

Add in the chunks of celery root, potato and apple along with the water and stock. Stir in the salt and a couple grinds of pepper. Bring to a low boil. Cover and reduce heat to simmer. Simmer for approximately 20 minutes or until the celery root and potato are tender when pierced with a knife or fork.

c soup cooking

Puree the contents of the pan in a Vitamix or other high-speed blender until very creamy (or to your liking). Return to pan. Stir in milk of choice. Taste and adjust seasoning.

Serve warm with a drizzle of olive oil. (Truffle oil would work well here, too!)

Enjoy!

c soup leeks

Read Full Post »

breakfast shake above

Time is precious, and we seem to have less and less of it these days. I’m a big proponent of starting the day with a full meal. Studies show it’s a critical component of weight management (or loss!), and can help keep energy levels where you need them to be.

I’ve shared several recipes for shakes and smoothies before, but they’ve all been drinks you’d have along with your regular meal (or to supplement your meal). But since my husband’s been traveling a lot lately, and I’m taking care of the kids all on my own morning, noon and night, I’ve had less time (and certainly less energy!) for preparing elaborate breakfasts. My kids’ school starts super early. (I think our chickens are still asleep!!) As I’m rushing around making their breakfasts, lunches and snacks, it’s my breakfast that gets short-changed. But I also don’t want to simply snack on something small just to find myself ravenous by mid-morning, especially if I have meetings or errands away from home.

So I’ve started making this shake, which is a complete breakfast in a cup. It tastes creamy, rich and satisfying, and it is creamy and rich tasting (thanks to the coconut milk and nut butter), and satisfying (thanks to the hefty amount of protein and good fats that keep you filling full until lunch. Plus the cinnamon is great for balancing blood glucose levels.)

You can obviously add other ingredients to it to change up the flavor, but include the basics as that’s what makes it a meal that lasts until lunchtime.


Ingredients

3/4 cup coconut milk

1/3 cup almond or cashew butter

1/2 apple

1 small banana

1 Mejdool date, pit removed

1 rounded tsp honey (preferably local and raw to help ward off seasonal allergies)

1 tsp pure vanilla extract

1 generous dash ground cinnamon

2-3 ice cubes (optional for those that like their smoothies cold)

1 tbsp ground flaxseed or chia (optional)

breakfast shake blender

Preparation

Put everything in your Vitamix or other high-powered blender and blend for 30 seconds.

Enjoy!

breakfast shake apple

Read Full Post »

turkey burger frontturkey burger closeHere’s another fast, nutritious and yummy dish. It works nicely with the grain-free diet my husband and I have adopted, and since the kids still love (and demand!) their grains, I make little sliders for them using whole-grain bread in place of buns.

This dish packs a ton of lean protein (thanks to the turkey meat and mushrooms), and works well for lunch or dinner. You’ll find this meal is very satisfying without leaving you feeling stuffed and bloated due to the absence of the bun.

You can add all the usual suspects that you would normally add to a really amazing gourmet burger. We love carmelized onions–as noted in my last posting of sweet potato & carmelized onion hash, as well as sauteed mushrooms, tomatoes and a balsamic/Dijon dressing that adds wonderful flavor. I would have added roasted red pepper to this dish, but didn’t have any at the moment. I’ve also had a similar version in a restaurant where they added herbed goat cheese. My husband avoids cheese like the plague, but it makes a great addition to your turkey burger salad! Get creative!


Ingredients

1 lb ground turkey meat (thigh or breast although thigh has more flavor)

2 cloves garlic, finely minced or crushed

1 tsp dried parsley

1 tsp dried oregano

1 tsp dried basil

2 tbsp soy sauce, Tamari (gluten-free soy sauce) or coconut aminos

1/2 onion, peeled, trimmed and sliced thinly into 1/4 or 1/2 rounds

1/2 lb cremini mushrooms, carefully cleaned, trimmed and sliced

1 ripe tomato

1 ripe avocado

1 small head of butter lettuce, trimmed, rinsed and dried (spun)

1/3 cup plus 2 tbsp extra-virgin olive oil, divided

1 tbsp good quality balsamic vinegar*

1 tsp (rounded) honey

1 tsp Dijon mustard

Sea salt

Fresh-ground pepper

*You may have noticed I almost always add “good quality” to my balsamic vinegar listing. I do this because there is a wide range of balsamic vinegars, and many are relatively watery and flavorless. A good quality, nicely-aged balsamic should taste good all on its own. Dip in a finger and taste it to decide.


Preparation

Preheat the broiler.

Heat 1 tbsp olive oil in a large cast-iron skillet over medium heat. Add in the mushrooms. Stirring occasionally, cook until mushrooms are tender and starting to brown on the edges.

Meanwhile, heat 1 tbsp olive oil in a small cast-iron (or other) skillet over medium heat. Add in the onions and cook, stirring occasionally, until the onions are translucent and starting to carmelize.

While the mushrooms and onions are cooking, put the ground turkey meat in a large mixing bowl along with the garlic, parsley, basil, oregano, soy sauce or soy sauce substitute and 1/4 tsp each salt and pepper. Using your hands, mix the meat and spices until thoroughly combined. Shape into two large patties, approximately 5 inches in diameter and 1 inch thick and two small patties (for the kids). Place on a grill pan or rimmed baking sheet and broil on the top rack until cooked, about 12 minutes for the large patties, flipping once after 8 minutes or so. (Note: I usually add cheese to my kids’ patties at the very end of the cooking time.)

In a small bowl, whisk together the 1/3 cup olive oil, balsamic vinegar, mustard, honey, 1/2 tsp salt and 1/4 tsp fresh-ground pepper.

Divide the lettuce onto plates.  Top with the burger followed by the mushrooms, onions, tomatoes and whatever else you’re using (except the avocado). Garnish with slices of avocado. Drizzle the dressing over the whole thing. Serve immediately.


Happy healthy eating!


turkey burger above


Read Full Post »

sweet potato hash abovesweet potato hash eaten

I’ve never cared for traditional hashbrowns, but I love hash–particularly hash made from sweet potatoes. You get all the yummy fried potato goodness but with a touch of sweetness and a lot more nutrition!

Sweet potato hash is one of my favorite breakfast eats. I’ve made it for a well-known celebrity, I’ve made it for brunch guests, and I make it for my family regularly. It’s also fast, easy and delicious because that’s how I like to cook!


Ingredients

2 medium sweet potatoes*, peeled and sliced into 1/2-inch dice

1 onion, sweet onion preferred, peeled, trimmed and cut into thin quarter or half rounds

Sea salt

Fresh-ground pepper

1 tbsp butter or ghee

2 tbsp extra-virgin olive oil

*There is a difference between sweet potatoes and yams, despite what grocery clerks might tell you, and you can use either in this dish. I like the texture of yams better, and I love the deep orange color.


Preparation

In a small cast-iron or other frying pan, melt the butter or ghee over medium heat. Add in the onions. Season with salt and pepper and stir occasionally until the pieces start to brown and carmelize.

Meanwhile, in a large cast-iron or other frying pan, heat the olive oil over medium-high heat. Add the sweet potatoes and stir so the pieces are evenly coated with oil and evenly distributed in the pan. Add about 1/3 cup water, cover, and simmer for 8-10 minutes or until the sweet potatoes are just tender when pierced with a fork. Uncover and continue to cook until the sweet potato begins to brown. Add in the onions and continue to cook until everything begins carmelizing. Add salt and pepper to taste. Serve immediately. Serve with eggs, muffins, fresh fruit–whatever you like. This dish makes a great accompaniment to just about anything.

Serves 4.

Enjoy!

sweet potato hash close


Read Full Post »

chick pomo closeCraving something pizza-y but don’t want all the bread (crust)? I’m calling this super easy to prepare dish “caprese stuffed chicken” after the now classic salad made of sliced tomatoes, fresh mozzarella and fresh torn basil.

This recipe has been in my recipe folder since my days in London–more than half a decade ago! It had gotten tucked behind some other chicken recipe and I completely forgot about it. I stumbled upon it recently as I was resorting and refiling recipes, and made it last week. It’s fast, easy and delicious! The trickiest part is securing the cut chicken breast once you’ve stuffed all the other ingredients inside. I used a toothpick, which worked fine, but get creative–you might find a better way.

chick pomo abovechick pomo tomatoes

Ingredients

2 chicken breasts

8 cherry vine tomatoes, sliced

8 thin slices mozzarella cheese

A handful of fresh basil leaves

Extra-virgin olive oil

Sea salt

Fresh-ground pepper


Preparation

Preheat oven to 400F.

Using a sharp knife, cut a horizontal slit in each chicken breast to make a pocket. Make it deep enough you can stuff in all the other ingredients. Salt and pepper the chicken breast on all sides, including in the pocket you just cut. Stuff the slices of cheese, fresh-torn basil leaves and tomatoes inside the pocket and close. Secure with toothpicks. Drizzle the chicken with olive oil.

chick pomo rawchick pomo cookIn a medium-size skillet (preferably cast iron!), brown the chicken breasts on both sides, about 5 minutes each side. After browning, place the skillet in the oven for 15-20 minutes. Serve with a side salad or grilled vegetables.

Serves 2.


Enjoy!


Read Full Post »

apple muffin closeapple muffin close2OK. You might be right… It seems I post a lot of muffin recipes. But who doesn’t love a muffin? Grain or grain-free, I’m a baker at heart. Muffins are simple to make, nostalgic for some of us, and there are infinite possibilities in the realm of muffins.

These almond apple muffins are moist, hearty and flavorful, just like muffins should be. They also get a boost of protein from the almond flour, and as usual, they’re low in sugar.


Ingredients

1 cup whole-grain spelt flour

1 cup almond flour (Bob’s Red Mill is a good choice)

1 1/2 tsp baking powder

1/2 tsp sea salt

2 1/2 tsp ground cinnamon, divided

1/4 tsp nutmeg

2 cups apples, cored and diced into 1/4-1/2-inch bits

1/4 cup butter, softened

1/4 cup coconut oil, softened

1/2 cup plus 2 tbsp evaporated cane sugar, divided

2 eggs

2 tsp vanilla extract

1/2 cup milk or milk substitute, such as coconut or almond


Preparation

Preheat oven to 375F.

Grease a standard muffin pan or use cupcake liners.

Mix the flours, baking soda, salt and 2 tsp ground cinnamon in a medium bowl. Use a fork to break up any lumps in the almond flour. Add in the diced apple and stir to coat the pieces.


apple muffin mixIn a separate large bowl, beat the butter and oil until fluffy. Beat in the eggs and 1/2 cup sugar until well blended. Mix in the vanilla extract and milk. Fold the flour/apple mixture into the wet mixture stirring until just blended.

Spoon into the prepared muffin tin filling each cup about halfway.


apple muffin bakeMix the remaining 2 tbsp sugar and 1/2 tsp cinnamon in a small bowl. Sprinkle over each cup of muffin dough. Place the muffin pan in the oven and bake for about 25 minutes or until muffins are lightly golden and a toothpick inserted in the center comes out clean.


apple muffin bake2Makes 12 muffins.

Enjoy!

Read Full Post »

« Newer Posts - Older Posts »

Cooking Without Limits

Food Photography & Recipes

Selma's Table

Life doesn't have to be perfect to be wonderful - stories and recipes from a wonderful life...