Feeds:
Posts
Comments
Taro fields in the lush Hanalei valley.

Taro fields in the lush Hanalei valley.


Happy new year! May your year bring great peace and joy, and of course, good health!

I haven’t posted in ages, and it’s not as though I haven’t been cooking and eating (a lot of both, actually). My sister and her family came to stay for the holidays, and while we cooked up a storm nearly every evening, I just couldn’t manage to photograph and/or write up anything. I’m sure you know how it is having people in your home and at your table every meal.

Then immediately after they departed, I went with my own little family to the gorgeous, still remarkably undeveloped island of Kauai. I hadn’t been since I was a child, and I was thrilled to see so much wild, virtually untouched land and incredible beauty. Since I love travel at least as much as I love food and cooking, I’d like to share these photos. I promise to post some yummy recipes very soon.

We spent the first three nights on the north shore near Hanalei Bay. Rain showers made our beach photos a little dark and grayish but those same showers keep the north shore incredibly lush and green.

We visited many beaches, swam with two giant sea turtles (remind me to ask for a Go-Pro for my birthday this year), took shelter from the rain in the deepest cave I’ve ever seen and hiked a mildly treacherous path high up along the Na Pali coast. More of the south shore in my next post…

HI bay

Looking down on Ke he Beach from high up on the Kapalua Falls trail.

The rugged peaks of the Na Pali coastline.

The rugged peaks of the Na Pali coastline.

Escapees of the last two major hurricanes... They are everywhere.

Escapees of the last two major hurricanes… They are everywhere.


A view of Halanlei Bay on a stormy day.

A view of Halanlei Bay on a stormy day.

The underworld near Ke he Beach, west of Hanalei.

The underworld near Ke he Beach, west of Hanalei.

Capturing the light of the setting sun from the car.

Capturing the light of the setting sun from the car.

apricot hd aboveapricot hd side


Like me, you might find yourself right in the midst of holiday parties. They’re fun, they’re festive, and they can be exhausting, particularly if you’re doing the hosting. We’ve been hitting our share of holiday cocktail parties, but we prefer to host actual dinner parties, where guests come around 5:30pm, enjoy some wine and hors d’oeuvres for the first hour, segue to dinner around 7:00pm and go home by 9:00pm or 10:00pm, depending on whether they have little ones in tow.

I typically serve a cheese, cracker and charcuterie platter with one other hors d’oeuvre–something that’s a little fancier because of its ingredients or because it requires some assembly. My basic offering includes a three-cheese selection, such as Manchego, Triple Cream Brie and Stilton with a selection of crackers, one or two kinds of salami and maybe sopressata along with a small dish of cashews or Marcona almonds.

But above and beyond unwrapping a few chunks of cheese and slicing some salami, my favorite go-to hors d’oeuvres are apricots spread with a basil-goat cheese and topped with  Marcona or herb-infused almonds. They look elegant, taste delicious and are a cinch to prepare. I also love that they work as hors d’oeuvres summer, winter, fall or spring. They always get gobbled up and exclaimed over, which is just what you want guest to do when they’re in your home, right?

Please note: I considered buying conventional apricots (treated with sulfur to keep their orange color) because they certainly photograph better, but I just couldn’t reconcile having a “health and wellness” blog and showing something laced with chemicals just because it looks prettier. Conventional apricots also have a sharper, sometimes slightly bitter taste, whereas natural untreated apricots have a subtle carmel flavor. So please focus on the wonderful flavor and texture combination, and never mind the naturally brown color of the dried apricots in my photos.


Ingredients

4 oz fresh, quality goat cheese, at room temperature

2-3 tsp milk

2 tbsp fresh basil leaves, finely chopped

40 dried apricots

40 Marcona or herb-infused almonds

Honey for drizzling


Preparation

In a small bowl, mix together the cheese, milk and basil until it’s very spreadable. Thin with more milk if necessary.

Spread the cheese mixture on each apricot and top with an almond.

Drizzle all the apricots with honey and serve.


Sante!


Chia pudding

chia abovechia side


I know some of you who know me personally are thinking I’m posting this tongue in cheek. I admit, I balked at the very idea of chia seed pudding for years. It sounded far too “crunchy” to me, as in too healthy, like some low-sugar, vegan dessert that either tastes like nothing and/or gets caught in your throat in much the same way a handful of straw would.

But chia seeds offer a lot… They’re rich in Omega-3 fatty acids–are even a better source than flax seeds, and unlike flaxseeds, chia seeds can be digested by your stomach while they’re still in the seed form. They’re also a good source of calcium, phosphorus and manganese as well as dietary fiber. And because the seeds form a gel-like substance when soaked in liquid, they’re thought to slow down the process by which the digestive enzymes in your stomach break down and convert the carbohydrates into sugar, which is why some people consider chia seeds beneficial for weight loss.

Given how nutritious chia seeds are, and because Costco now sells a big bag at a great price, I started throwing a heaping spoonful in my morning smoothies. I noticed right away how they made my smoothies richer and creamier, so I finally thought, why not give the pudding a try?

To make a long story short, I’m officially addicted to chia pudding now! I actually have to pace myself to prevent eating a big bowl of it every time I open the refrigerator. It’s lightly sweet, incredibly creamy and offers a wonderful mouthful of tiny but powerful little crunches with every bite–not unlike tobiko, the tiny fish eggs that often adorn rolls of sushi. I’ve always appreciated the tiny but satisfying crunch of each little fish egg. In fact, I joke that tobiko is the gift that keeps on giving, because even hours after eating sushi, you can be suddenly, but pleasantly surprised by a tiny and unexpected little crunch in your mouth. But I digress…

Chia pudding is a cinch to make and provides a perfect, light, but rich-tasting treat to enjoy any time. I’ve been eating it for breakfast with fresh raspberries and a spoonful or two of pomegranate seeds (for extra crunch, of course!).


Ingredients

1/2 cup black chia seeds

1/2 cup coconut water

1 1/2 cups full-fat coconut milk

1-2 tbsp maple syrup

1 tsp pure vanilla extract

Pinch of sea salt


chia mix

Preparation

Stir all the ingredients together in a glass bowl until thoroughly blended. Cover and chill for at least 2 hours but preferably 4-8 hours.

Serve in small bowls layered with fresh fruit. Serves 4-6 depending on how much fruit you’re using. Keeps for several days in the refrigerator in an airtight container.


Enjoy! 

Pickled vegetables

pickled veg abovepickled veg bits

I love that pickling is making a comeback, and for all the right reasons–anyone can pickle, you can pickle just about anything, it’s inexpensive, and it’s a great way to enjoy raw or nearly raw foods.

As a child, I grew up eating pickled herring, beans and asparagus spears. I also ate regular dill pickles, which I actually didn’t crave during my two pregnancies, but became addicted to years later. (Too much of a good thing is bad, right?) But despite the fact that pickled foods have been around for eternity, this past year, I’ve noticed that many of the fancy and/or hip farm-to-table themed restaurants in our area now offer an assortment of pickled vegetables on their menus. We have a favorite little restaurant in the Russian River Valley wine region called The Backyard. They serve consistently good food, offer a nice selection of wines and if the weather is nice, you can enjoy your meal outside under a giant California oak. (Does life get any better than that?) The last three times we’ve eaten at The Backyard, they have served a delightful mix of pickled things. I know “things” isn’t very descriptive, but the pickled items have included everything from watermelon rinds to shitake mushrooms–all delicious and perfectly pickled.

Sadly, we don’t make it up to the wine country often enough. So instead of enjoying pickled vegetables only on occasion, I decided I needed to enjoy them on a daily basis. As I mentioned, you can pickle just about anything, and you can flavor the pickling many different ways. I have never appreciated sweet pickles or sweetly pickled vegetables, so this recipe is for your classic savory, dill flavor.

I photographed two different batches for this posting, one in which I used carrots, daikon radish, and red onion, the other in which I used beets, carrots, and daikon. With both batches, I flavored them simply with salt, yellow mustard seeds (which you also eat once they’re pickled), garlic and bay leaves. Provided you use clean jars to store your pickled vegetables, they will keep refrigerated for two weeks.

pickled veg side


Ingredients

5 cups vegetables (carrots, beets, radishes, celery, watermelon rind, mushrooms, onions, etc.)

3 cups distilled white or cider vinegar
3 cups filtered water
2 tbsp + 2 tsp sea salt
1-2 tbsp sugar
1-2 tbsp mixed herbs, such as bay leaves, garlic, mustard seeds, peppercorns, thyme, etc.
Preparation
Bring a very large pot of water to boil on one burner. On a second burner, stir the vinegar, water, salt and sugar together in a large non-reactive pan and bring to a boil stirring to dissolve the salt and sugar.
While you’re waiting for the water to boil, wash, peel and chop your vegetables keeping them sorted by kind. Once the water is boiling, add in batches of the vegetables that need to be lightly cooked before pickling, such as beets and carrots. I like to cook beets for 3 minutes and carrots for 1-2. If you cook them in batches, you can use a slotted spoon to remove one batch before putting in the next. I don’t think onions, celery or daikon need to be cooked at all prior to pickling.
Mix the vegetables in a large bowl, spoon them into clean glass jars, and add in the mixed herbs. When the water/vinegar mixture is ready, pour it over the vegetables making sure to cover them completely. Screw on the lids and set in the refrigerator.
Your delicious, pickled vegetables will be ready in 4 hours although they are even better a day or more later! You can serve them with an assortment of charcuterie or cheeses  and/or some rustic bread and Dijon mustard.
Enjoy!
 
pickled veg whole 

Mushroom tart

mush tart abovemush tart close


mush tart slice2Mushrooms and I share a deep love that’s existed as long as I can remember. Growing up in Eastern Washington, I recall long walks in the forests behind our home, and annual trips to the Fourth of July pass, where my family of four would scour the ground beneath the trees in search of mushrooms like little buried treasures waiting to be discovered. We hunted–because the official expression is “mushroom hunting”–for chanterelles, shaggy manes, morels; each variety hungrily sought after at different times throughout the year. We considered morels the most precious, and would sometimes walk for hours with our heads bent down, scanning the pine-needle covered ground for the telltale bump, and perhaps even the “wrinkly”brown of an actual cap. Sometimes we would return with just a handful of morels, which my father would carefully clean, slice and saute with just a little butter and salt. In those cases, we would only get a few slices each, and we would savor each bite for as long as possible, tasting the earthiness, dampness and silkiness only captured by mushrooms. Sometimes we would score a bag of chanterelles or shaggy manes, which would be sauteed with a little white wine and greedily devoured the same evening.

For a brief period, I hardly ate any mushrooms, not because I had lost a taste for them, but because someone or something had misinformed me about their nutritional value, and I came to see mushrooms as a filler, like potatoes. Luckily, that phase was short-lived, and we now eat mushrooms every week–usually two times per week. I still love the slightly musty earthy flavor, and I now appreciate how healthy they are.

In addition to serving as an excellent source of low-fat, zero cholesterol protein, mushrooms provide good amounts of several important nutrients including niacin, riboflavin, selenium and copper. But the best news about these immunity-boosting forest dwellers lies in their anti-cancer properties. Numerous studies have linked regular consumption of mushrooms with a decreased risk of a range of cancers, most notably breast cancer. Several international studies have shown that eating just one mushroom a day can reduce a woman’s risk of developing breast cancer by more than 50%. Studies involving maitake mushrooms, also known as Hen of the Woods, suggest that regular consumption can limit or even reverse tumor growth.

Add mushrooms to soups and sauces, or use them as a meat substitute for your Meatless Monday. I regular add chopped shitake mushrooms to the pasta sauce and pizzas I make for the kids. They still won’t eat them whole, but it must be a texture thing since they love mushrooms chopped or pureed into many of their meals.

This mushroom tart is simple to make, and is rich and flavorful. It would make a nice addition to your Thanksgiving or Christmas spread. I served it to my mother recently with my persimmon, avocado little gem salad. I devoured two pieces that evening and ate the remaining two servings the next day.


Ingredients

Dough for standard tart crust (standard or gluten-free, recipe here)

1 tbsp butter or ghee

1 tbsp  extra-virgin olive oil

2-3 shallots, thinly sliced

2 cloves garlic, minced

3 sprigs fresh thyme

4-5 cups of mushrooms* washed, trimmed and sliced into 1/4-inch thickness (any mix you like)

1/2 cup dry white wine

1 cup chicken stock

1 tsp sea salt

1/4 tsp fresh-ground pepper

1/3 cup creme fraiche

3 tbsp parmesan cheese

* I used trumpet and tree oyster mushrooms, but you can make this dish even more spectacular using more expensive and exclusive mushrooms, such as chanterelles. Regardless, I think a mix works best.

mushroom tart shroomsmush tart shallots


Preparation

Preheat the oven to 375F.

Press the dough into a 9-inch tart pan. Prick the bottom several times with a fork and bake in the center of the oven for 12-14 minutes or until the crust is lightly gold on its edges.


mush tart shallots simmermush tart skillet

In the meantime, melt the butter or ghee with olive oil in a large skillet over medium-low heat. Add in the shallots and garlic and cook, stirring often until the shallots have softened and begin to turn translucent.

Add in the thyme leaves and mushrooms and continue to cook for 2-3 minutes. Add in the wine and cook 2-3 minutes more. Add in the chicken stock and cook, stirring frequently until all the liquid has evaporated.

Stir in the salt, pepper and creme fraiche, and spoon the mixture into the tart crust, spreading evenly. Sprinkle with parmesan cheese and bake in the oven for 20-25 minutes.


mush tart spread

Serve immediately.

This dish reheats surprisingly well, so you can enjoy leftovers the next day–if there are any!

Happy Thanksgiving!


Enjoy!


rice


Growing up in a home with a Japanese mother, I considered white rice a dietary staple. I estimate we ate white rice at least three times a week, possibly more. In fact, my mother shunned the potato, as did I for many years,until I married a Dutchman.

When my children were still babies, and it was time to start them on solids, I remember mixing some of my breast milk with organic rice cereal as their first “food.” It was what was recommended by nearly every pediatrician and respected baby book author at the time.

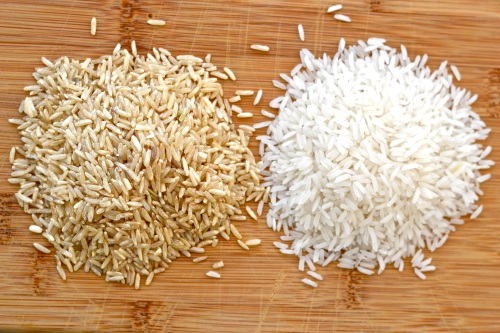
A few years ago, I tried embracing brown rice after hearing how much healthier it is than white. I often ordered it in restaurants in and around San Francisco, where the waitstaff are all trained to ask if you want white rice, brown rice, or a mix. I sometimes bought sushi made with brown rice from my favorite natural foods market. But I could never made the switch completely. Maybe it was the result of too many years enjoying the naturally sweet stickiness of white rice, or the fact that white rice absorbs the juices and sauces from my cooking so much better than brown.

Regardless, I now shun brown rice entirely. Please read on to discover why.

First, some basics… White rice is essentially brown rice in which the bran and germ portions have been removed. White rice carries a higher glycemic index, which suggests brown rice results in a slower increase in your blood sugar level after consumption. Doctors and nutritionists also consider brown rice healthier because the refining process of white rice results in a loss of vitamins, fiber, lignans and minerals, such as magnesium and manganese. Brown rice is also a rich source of selenium, which is thought to reduce the risk of major disease, including cancer, arthritis and heart disease, and it’s high in manganese, which helps the body synthesize fats. It’s surprisingly rich in anti-oxidants, and it’s high in fiber, an essential part of our diet to maintain healthy bowel function and help prevent colon cancer. Studies have shown that replacing white rice with brown rice in your diet will lower your risk of type 2 diabetes.

That all sounds pretty good, doesn’t it? And those of you who have switched to brown rice are feeling pretty good about your choice. But it turns out not to be as simple as that, and in fact much more serious.

Brown rice is also full of phytates, which bind to vitamins and minerals preventing absorption. So while brown rice may contain more vitamins and minerals, those vitamins and minerals aren’t being absorbed. The phytic acid is also thought to inhibit the enzymes which break down protein, impairing proper digestion.

But what’s most concerning is that a 2012 study conducted by Consumer Reports Magazine (CRM) found many popular rice products contained arsenic–some with dangerously high levels of arsenic, including foods marketed as “healthy” snacks and organic rice cereal for babies. The study tested more than 200 samples from a variety of rice products, many of which are targeted to the rapidly growing “gluten-free” market. Here’s the CRM chart summarizing their findings.

Arsenic, a known human carcinogen that is particularly harmful to infants’ and children’s developing brains, is known to cause lung, bladder and skin cancer in humans. According to the Environmental Protection Agency, there is no “safe” level of inorganic arsenic exposure. The CRM report stated, “We found significant levels of inorganic arsenic, which is a carcinogen, in almost every product category, along with organic arsenic, which is less toxic but still of concern. ”

Where both brown and white rice were tested within the same brand, the brown rice was found to have higher arsenic levels than the white rice. In some cases, brown rice had nearly twice the safe limit (based on the 5 parts per billion per serving recommended by the EPA for drinking water). This makes sense since the arsenic concentrates in the outer layers of the grain which get removed when processing to white rice.

Arsenic is also found in fruits and fruit juices and vegetables, which together provide the greatest exposure to arsenic for most of us. Some growers will argue that arsenic is naturally occurring in soil since it can leach into soil from the weathering of rocks and minerals in the earth that contain arsenic. However, humans are the main cause of arsenic in our soil and water. The U.S. continues to the the world’s leading user of arsenic. It’s estimated that more than 1.5 millions tons have been used for industrial and agricultural purposes since the early 1900s. So it comes as no surprise that the CRM study found that rice from Arkansas, Louisiana, Missouri and Texas–where the vast majority of rice is produced in the U.S., had higher levels of total arsenic and inorganic arsenic compared with samples from elsewhere. Those states have a long history of cotton production, a crop that was heavily treated for decades with arsenical pesticides.

The risks of arsenic exposure are greatest for children and pregnant women, because that’s when young brains are developing. The CRM study found concerning levels of arsenic in infant cereals, usually fed to babies as they begin solids between 4 months and 1 year of age. Some nutritionists would suggest pregnant women avoid rice all together, and that babies should never be fed rice or rice cereal.

My recommendation? I’m not a licensed nutritionist, but I would offer this:

– Avoid eating brown rice entirely or eat it only on rare occasion.

– Considering what little nutrient value white rice provides, and knowing that you and your family will still have arsenic exposure from fruits and vegetables, make your choice accordingly.

– Do not buy rice grown in the south-central region of the U.S.

– Buy Lundberg Family Farms Organic rice, if it’s available where you live since it had the lowest levels of arsenic and the company is looking at ways to lower the levels even further.

– Reduce arsenic levels by washing your rice well with warm water (about 6-8 changes of water) until the water runs clear.

– Further reduce arsenic levels by washing your rice a final time after it’s cooked using filtered water or regular tap water if you know your local water doesn’t contain significant levels of arsenic.

 
Be well!

farmstead salad close

farmstead salad aboveThis delicious combination of crunchy Fuyu persimmons and little gem lettuce combined with creamy avocado and green goddess dressing is also known as “Favorite Fall Salad.” My husband and I first tasted it last autumn in one of our favorite restaurants in the wine country–The Farmstead in Saint Helena, Calif. My husband promptly declared it to be his favorite salad ever, although a word about my husband, he tends to use superlatives, such as “best,” “greatest” and “favorite” as though he knows no subtler forms of expression. I’ve tried to replicate the salad several times, but I finally got it–at least I made a version I think tastes as good if not better than what I remember from that lunch a year ago.

In addition to the great combination of crunchy and creamy, this salad brightens a table with it’s virbrant green and orange colors. It compliments nearly any main dish, especially grilled or roasted meats. The green goddess dressing is my own version. A lot of other recipes for this dressing call for sourcream, but I think buttermilk makes a nicer, lighter version.


Ingredients to serve 4

2 bunches little gem lettuces

1-2 Fuyu persimmons, cored and sliced 1/8-inch thick

1 ripe avocado, peeled, seeded and cut into 1/2-inch cubes

Green goddess dressing

2-4 anchovies (from jar or can)

1 small garlic clove, minced

1/2 cup mayonnaise (or mayo substitute)

1/2 cup buttermilk

1/2 cup fresh flat-leaf parsley, chopped

1/4 cup fresh tarragon, chopped

3 tbsp fresh chives, chopped crosswise

2 tbsp fresh lemon juice

Sea salt and fresh-ground pepper to taste


Preparation

Place all the ingredients for the dressing in a blender and blend until evenly incorporated. (Note: I like mine well-blended so there aren’t big bits of parsley, but blend to your liking.)

Tear the lettuce leaves into bite-size pieces in a large bowl. Add in the sliced persimmon and avocado. Toss with several spoonfuls of the dressing, taste and add more dressing if necessary until all the lettuce pieces are coated. Serve immediately.

Save any leftover dressing in an airtight container in the refrigerator.


Happy Fall!
 
farmstead salad above2

paleo waffles above

paleo waffles


Some people embrace the Paleo diet and seem to happily shun breads, muffins, pies and all other bread-like foods. I seriously doubt if I will ever be one of those people. My love affair with baked goods and all things breakfast-like continues and shows no sign of weakening. Fortunately, I am not completely Paleo as I’ve mentioned before. I am 85/15 most weeks, allowing a little dairy–usually in the form of goat cheese or sheep feta, and a little grain into my meals once or twice a week.

That said, I am always on the look out for great grain-free options to some of my favorite foods. This waffle recipe is incredibly simple, and the waffles come out light and fluffy with lightly-crisped edges. You will be amazed–even dubious, that they’re grain-free. And I’m sure you’ll appreciate how you can literally make the batter, and have your first batch of waffles in about 10 minutes. That means these waffles aren’t just for weekends. (Note: The success of this recipe does require a high-powered blender, such as a Vitamix. A regular blender can’t pulverize the nuts to fine powder.)

This recipe is from Danielle Walker’s Against all Grain, although I’ve reduced the amount of sweetener called for in the recipe.


Ingredients

3 large eggs, at room temperature

1/2 cup coconut milk

1 tbsp raw honey or maple syrup

3 tbsp coconut oil, melted

1 tsp pure vanilla extract

1 cup raw cashews or macadamia nuts

3 tbsp coconut flour (I use Bob Red Mill’s)

3/4 tsp baking soda

1/4 tsp sea salt

1/2 cup fresh blueberries


Preparation

Preheat a waffle iron to low. (I set mine on 3 out of 10.)

Place all the ingredients (except the blueberries) in a high-speed blender, in the order listed. Blend on low for 30 seconds, then increase the speed to high and continue to blend until completely smooth, about another 30 seconds.

Poor the batter into the waffle iron so that it fills evenly to just below the tops of the grid. Sprinkle a small handful of blueberries over the batter. Close the lid and cook for approximately 1-2 minutes or until the steam stops rising from the waffle iron and the waffles are a nice golden color.

Serve immediately with extra blueberries and a little maple syrup or honey.


Enjoy!

Natural “gello”

gello orangegello red above2


Do you remember eating finger Jello during your childhood? I loved the stuff, and despite the fact that my mother normally fed us healthy food, she seemed to think the benefits of Jello outweighed all the white refined sugar and food coloring it contained. We would regularly make finger Jello as a snack or treat, and on special occasions, particularly holidays, she would make a pretty layered dish with green Jello. This dish was eaten with relish by even the most sophisticated foodies in our lives during that time. One layer contained sliced pears in the green translucence, the other had cream cheese blended in, which made a dreamy pale green color. And my mother always added a few drops of peppermint extract, so the whole dish had a wonderfully light, minty taste.

Several decades passed by in which flavored, colored Jello did not make an appearance. But I did think fondly of it from time to time. Then I started making my own coconut milk yogurt, and found that natural, unflavored, unsweetened gelatin thickened my yogurt nicely. Seeing that creamy, slightly gelled thick yogurt got me thinking more and more about the beloved finger Jello of my childhood. On a side note, I have also been making bone broth regularly–not stock from leftover bones that you use as a soup base, but specifically broth from gelatinous bones that I order and buy from the local farmers market. It is quite gelatinous once it’s cooled, and I swear it has greatly improved my overall digestion and well being. (I will speak about all the virtues of bone broth in another posting.)

gello containersSometimes, I forget to place my order for gelatinous bones, and the farmer sells out before I arrive at the market. This made me wonder if I could find an off-the-shelf product. Luckily, I quickly discovered a great product, Great Lakes Gelatin, derived from pastured animals. It comes in two forms, regular unflavored gelatin and “Collagen Hydrolysate.” Gelatin is an excellent source of protein, boasting 6 grams per tablespoon with zero carbohydrates. The hydrolyzed version is intended to help regulate your body’s metabolism by giving you pure protein that is easily absorbed by the body. (It can be used as a weight loss aid.)  It’s the same collagen found naturally in the bones, skin and cartilage of animals, and is thought to lubricate joints and help build connective tissue. By age 25, our bodies begin losing the ability to repair supporting connective tissue (and we begin to see those annoying wrinkles forming). Natural gelatin is also chock full of amino acids like lysine, glycine and proline which the body needs to regulate cell function.

Growing up, my fingernails were as tough as, well, nails–the carpentry kind. I could pick things off, pull things apart, scrape things up and generally do anything with my fingernails without a chip or split. However, in recent years, I noticed my fingernails becoming more brittle. If I accidentally jammed one into the car door, the door won. If I picked a sticker off my kids’ dresser using my nails, one or two might chip a little, and my nails generally seemed thinner.

I report with glee that I’ve been using the natural gelatins for a couple of months now, and my nails are, once again, nearly indestructible! Of course, I’m also waiting to see if some of my wrinkles fade away, but that might be wishful thinking. I also expect my hair will grow thicker, although I might not notice it for some time.

I use the natural gelatin in the red container for making yogurt and finger “gello” or gelatin dessert, and I use the hydrolyzed version in my smoothies (it dissolves easily in cold water). I love that I can make something for me and my family that is fun to eat, feels like a dessert but yet contains no sugar except what’s naturally in fruits and their juices. And the possibilities are endless… I recently made coconut finger gello using my favorite coconut milk. It’s delicious with fresh berries on top.

gello orange closegello red above


Ingredients for basic “gello”

1/4 cup cold water

2 rounded tbsp natural gelatin*

1/4 cup hot water (near boiling)

1 1/2 cups fruit juice

1 cup berries or chopped fruit, such as pear

*Use more if you want your “gello” really firm and easily held in the hand


Preparation

Arrange the cut fruit or berries on the bottom of an 8×8-inch pyrex or ceramic square pan.

In a medium bowl, pour in the cold water. Sprinkle the powdered gelatin evenly over the water and allow to “bloom” for about 10 minutes. Whisk in the hot water until all the gelatin is dissolved. Whisk in the juice. Pour the mixture over the fruit, cover the pan with plastic film wrap and chill in the refrigerator for 2-3 hours or until fully set. Cut into squares when ready to serve.


Variations

Coconut finger “gello” – Skip the fruit and juice and whisk in one can of coconut milk along with 1-2 tbsp maple syrup.

Pureed fruit “gello” – Puree fruit in a high-powered blender until smooth and use approximately 3 cups in place of the juice and chopped fruit. I used ripe persimmons (peeled and cored) from our tree!


Enjoy!
 

gello orange abovegello red close


Gluten-free banana muffins

banana muff bakedbanana muff above


These muffins will please even the most stubborn anti- gluten-free individual. Deliciously moist with a cake like texture, they will get devoured in minutes, and you’ll find yourself waiting impatiently for the remaining bananas on your counter to ripen so you can make another batch. In fact, I plan to put three or four of my bananas in the sun tomorrow to help speed up the process. Bananas are perfect for baking when their peels are speckled brown (see photo below).

The natural sweetness of banana combined with the coconut milk and almond flour means you only need to use a little added sugar in these muffins. I wrote the recipe for 1/2 cup since I’m often accused of taking out too much sugar, but I make this recipe with 1/3 cup sugar and my family considers them plenty sweet. Feel free to experiment and finds what works for your taste. And last weekend, I only wanted chocolate chips in a few of the muffins to surprise the kids, so instead of mixing the chips into half the batter, I simply sprinkled a few chips in each cup after spooning the batter in, and the chips sunk down and baked in nicely. I ate mine with scrambled eggs and sauteed tree oyster mushrooms–the perfect balance of sweet and savory!


Ingredients

1 cup all-purpose gluten-free flour

1/2 cup almond flour (I like Honeyville)

1/2 cup sugar

3/4 tsp baking powder

1/2 tsp baking soda

1/4 tsp sea salt

1/2 tsp ground cinnamon

1/8 tsp cardamon

2 eggs

3/4 – 1 cup ripe banana, mashed (about 2-3 bananas)

1 tsp pure vanilla extract

1/2 cup coconut milk

1/4 cup coconut oil, melted or olive oil

1/2 cup finely chopped walnuts, optional

Other options: 1/3 cup currants or vegan chocolate chips


banana muff ripe

banana muff fill


Preparation

Preheat oven to 350F.

Line a standard 12-cup muffin pan with paper liners.

Whisk the first six ingredients together in a medium-size bowl.

In a large bowl, gently whisk the eggs until pale yellow in color. Whisk in the mashed banana, followed by the vanilla, milk and oil. Using a spatula, fold the dry ingredients into the wet and stir until just combined. Fold in the nuts and/or currants or chocolate chips if using. Spoon evenly into the 12 cups of the muffin tin.

Bake for 25-30 minutes or until a toothpick inserted in the middle of a muffin comes out clean.

Allow muffins to cool for 5 minutes before serving. Serve warm, plain or with a little butter.


Enjoy!
 
banana muff meal
Cooking Without Limits

Food Photography & Recipes

Selma's Table

Life doesn't have to be perfect to be wonderful - stories and recipes from a wonderful life...